Export Digital Certificate to PFX file in Windows
You can export any certificate from windows certificate store in PFX format. Follow the below steps to export your certificate to PFX file
1. Launch MMC Console
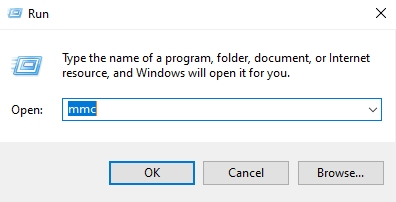
In Windows Start, type
‘Run‘- –> type ‘mmc‘, and click on ‘OK‘ to open the MMC console.
2. Add/Remove Snap-in
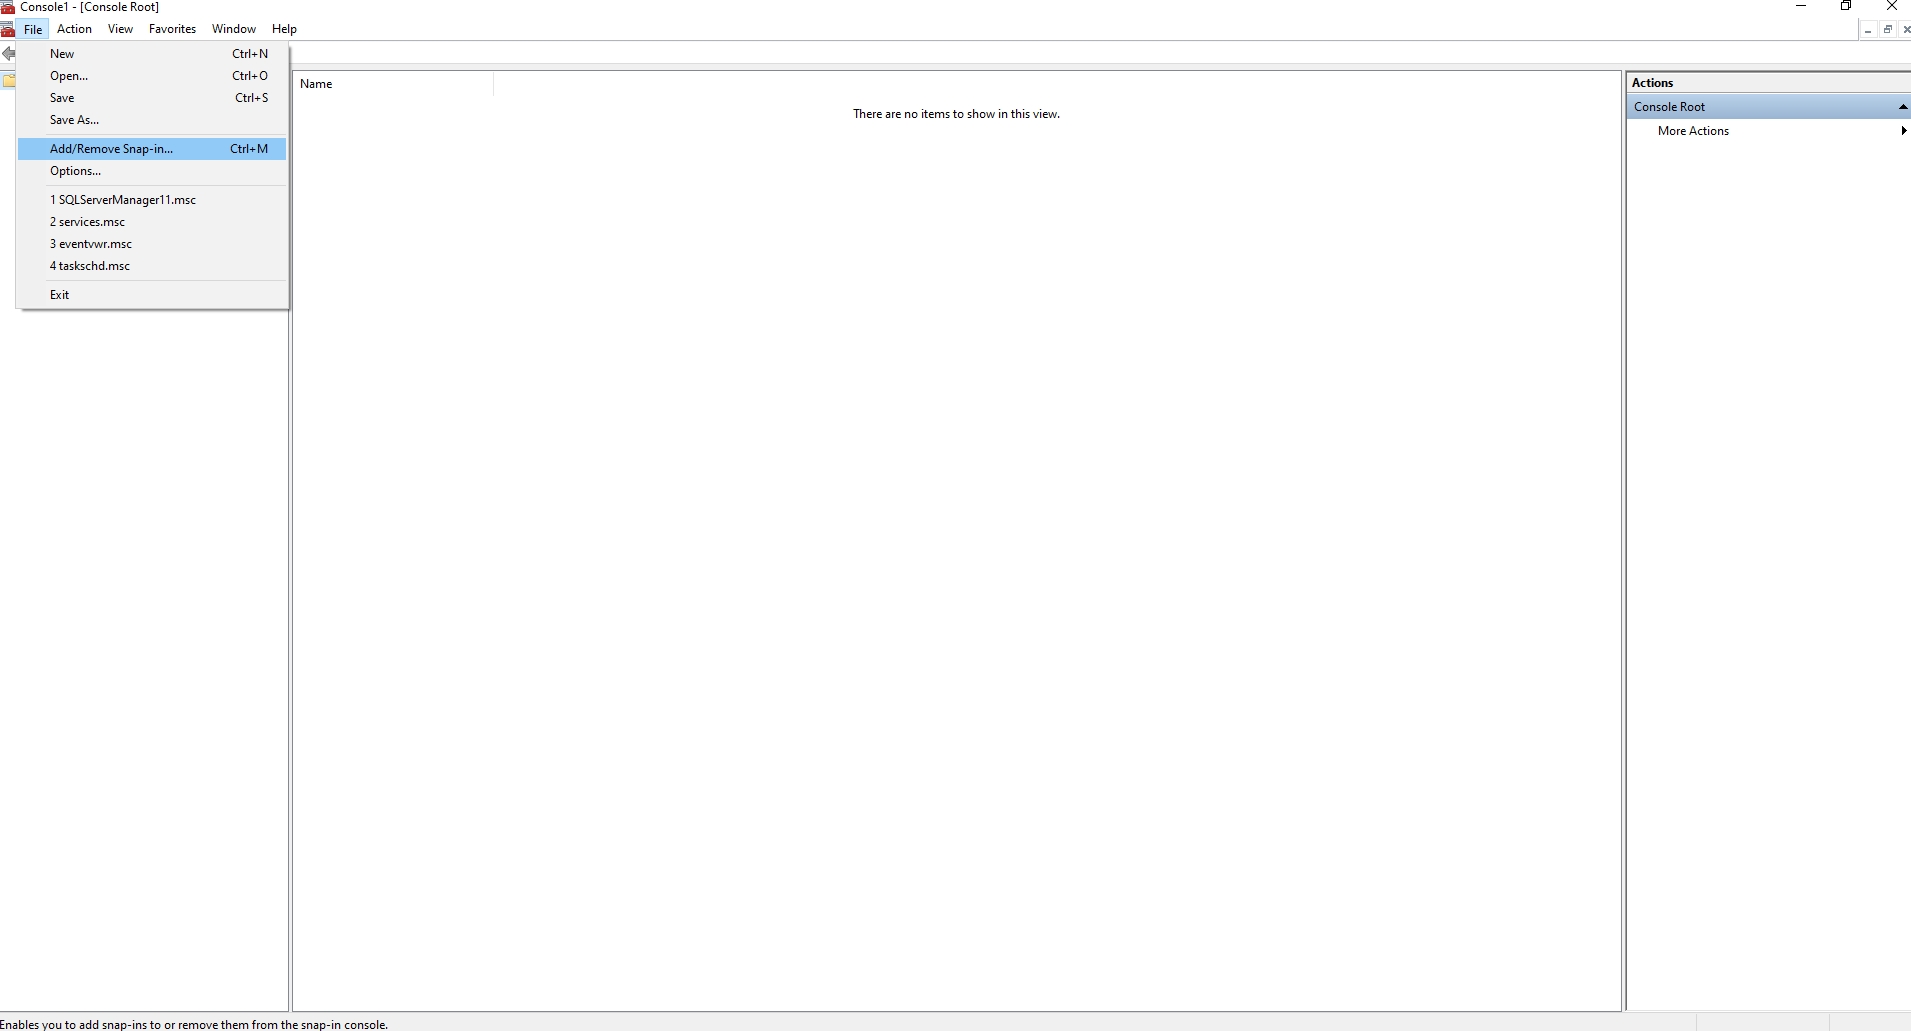
In the console, click on ‘File‘ –> select ‘Add/Remove Snap-in‘.
3. Add Certificate Snap-in
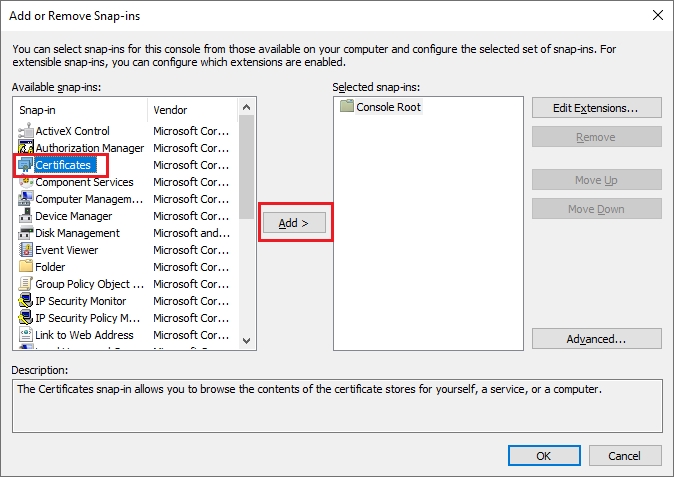
In Add / Remove Snap-in, select ‘Certificates‘ from Available snap-ins, and click on ‘Add >‘ .
4. Add Computer Account to Export Computer Certificate
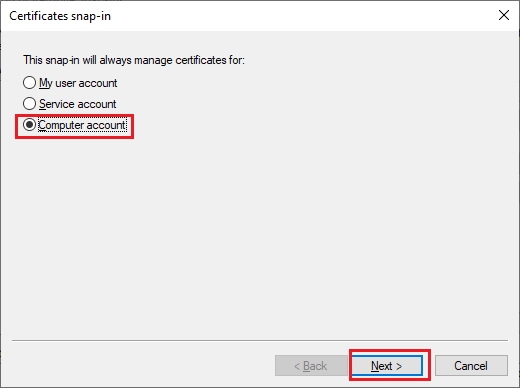
In the certificates snap-in window, select ‘Computer Account‘, and click on ‘Next‘.
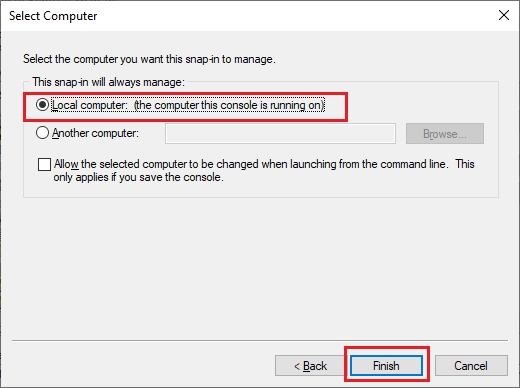
5. Select the Local Computer
Select ‘Local computer: (the computer this console is running on)‘ from which we are exporting the certificate, and click on ‘Finish’ to complete the certificated snap-in addition in the MMC. Select Another Computer if you want to export the certificate from a different computer.
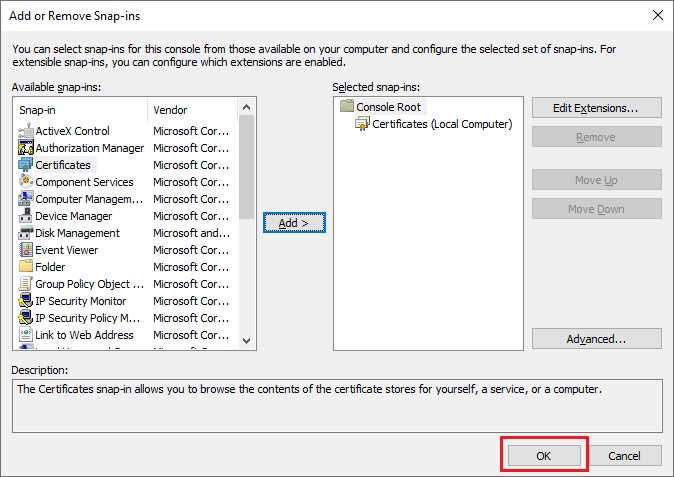
6. Click ‘OK’ to Complete the ‘Add or Remove Snap-in’ Window
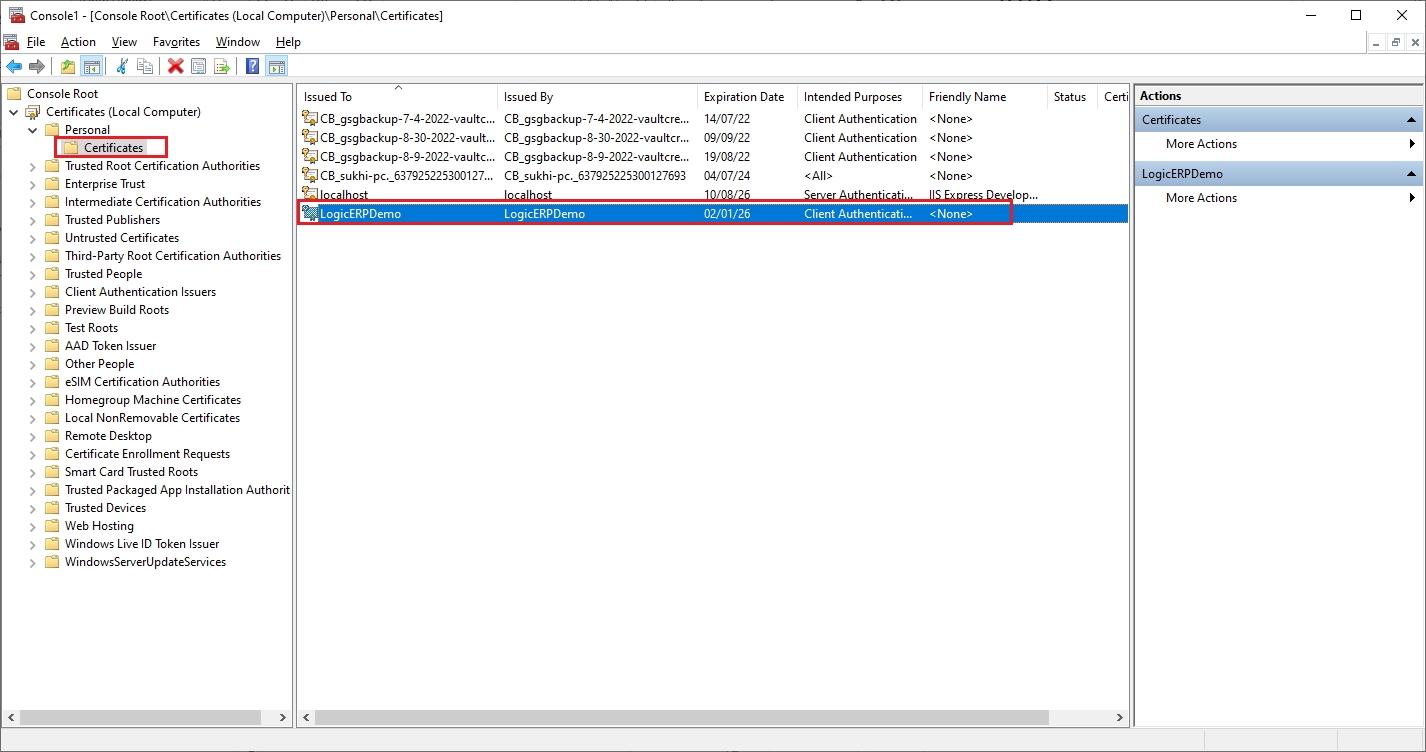
7. Select the Certificate You Want to Export
In this case, certificates exist in Personal Store. Expand Console Root –> Certificates (Local Computer) –> Personal –> Certificates.
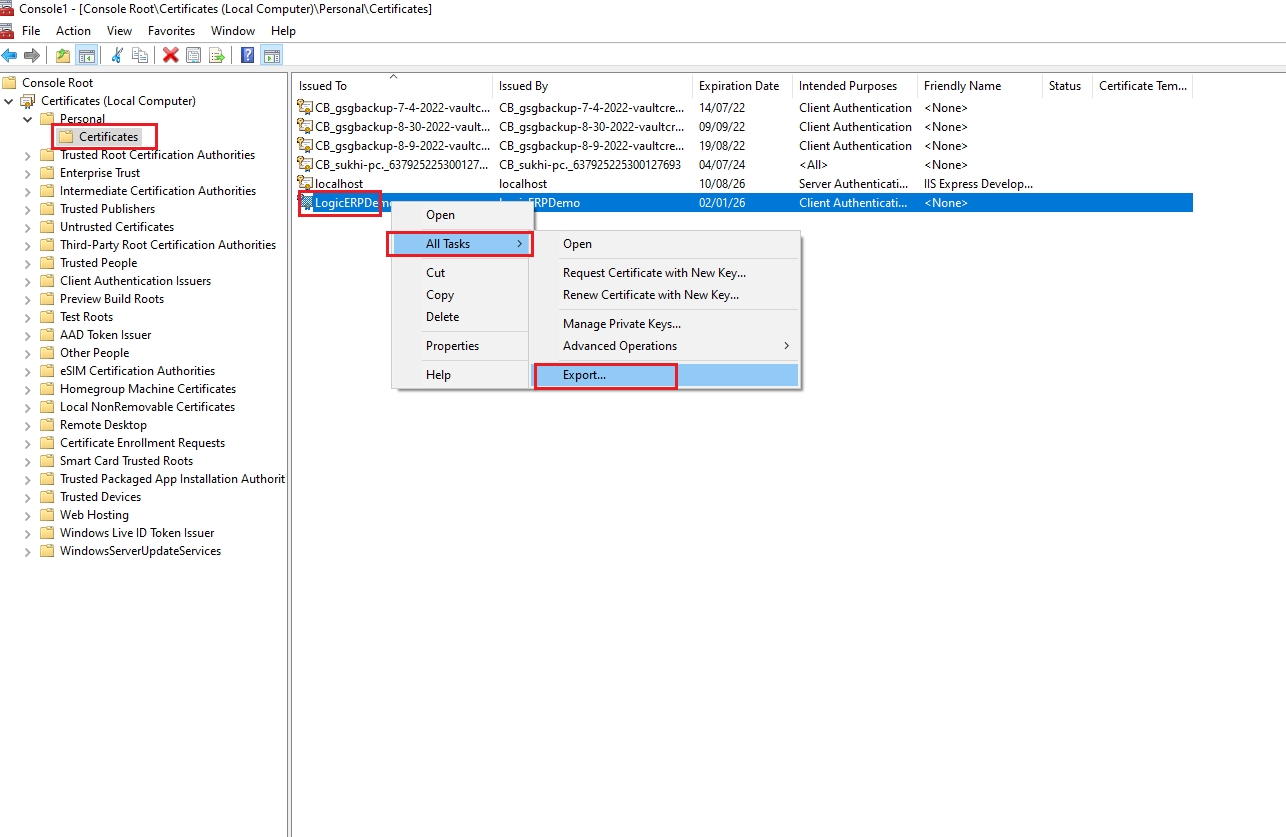
8. Export the Certificate
Select the certificate which needs to Export. Right-click on the certificate –> Select ‘All Tasks‘ –> click on ‘Export. ‘
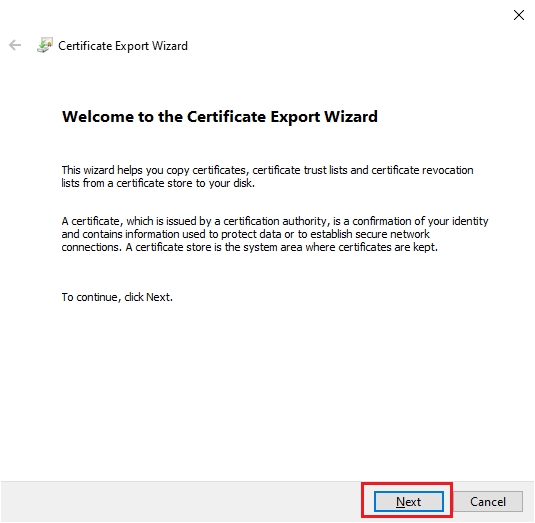
9. Certificate Export Wizard Opens. Click ‘Next’ to Continue
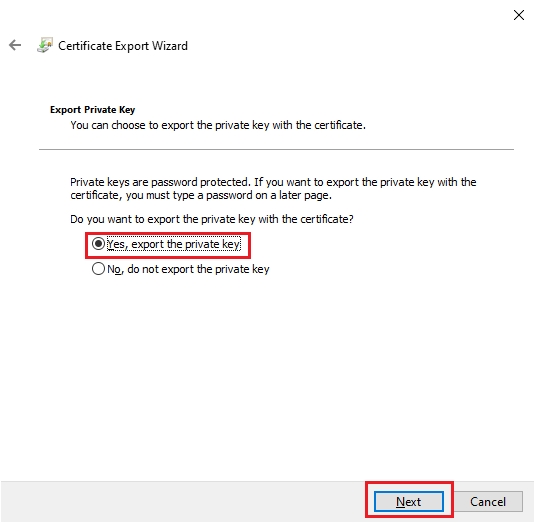
10. Select the Export Private Key Option
Under the ‘Export Private Key‘ window, Select ‘Yes, export the private key‘ to export the certificate with Private Key. Click ‘Next‘ to continue.
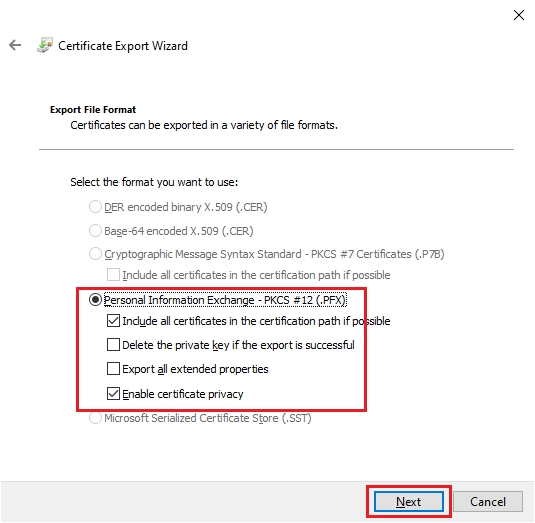
11. Select PFX Format
Under the ‘Export File Format’ window, select ‘Personal Information Exchange — PKCS #12 (.PFX)‘ and check ‘Include all certificates in the certification path if possible to include the chain of Intermediate CA certificates into the certificate file. Click ‘Next‘ to continue.
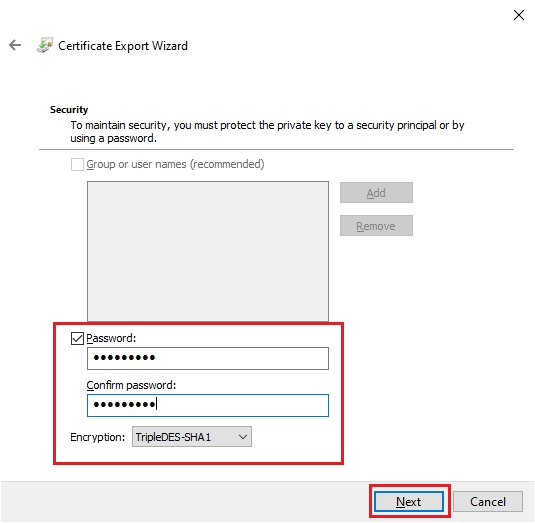
12. Encrypt the Certificate with Password
In the ‘Security’ Window, check ‘Password‘ and set a ‘Password‘ and ‘Confirm Password’. This password will be used while Importing the certificate. Select the ‘Encryption’ to ‘TripleDES-SHA1‘. Click on ‘Next‘.
13. Export the Certificate with Private Key in PFX Format
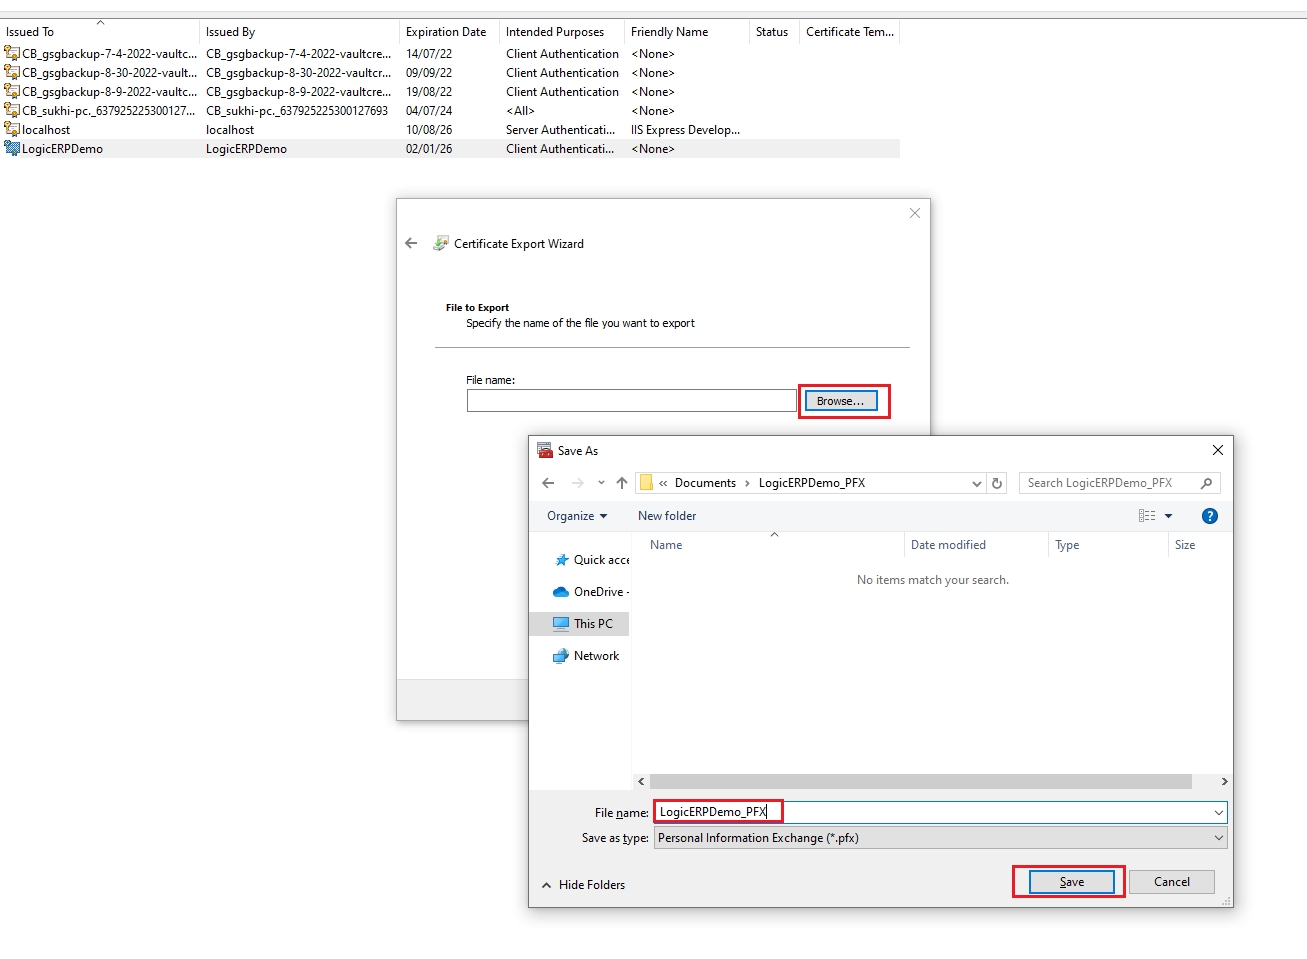
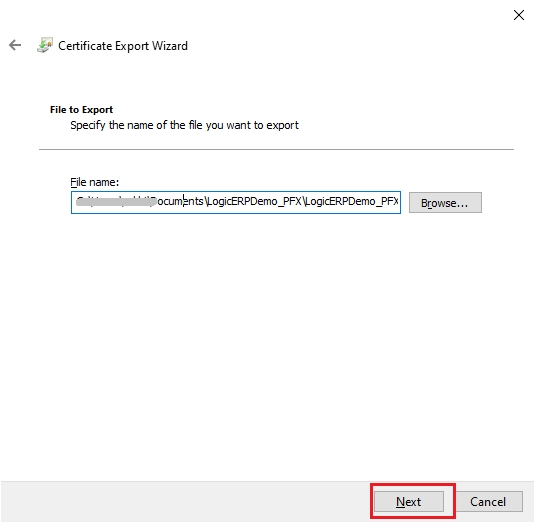
In the ‘File to Export‘ window, Select the File Name and the Location where the certificate with Private Kay will be exported. Click on ‘Next‘.
14. Certificate Export Wizard Summary
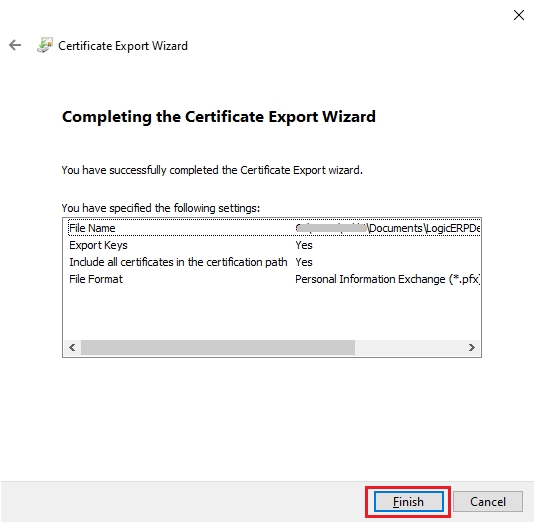
Take a look at the ‘Certificate Export Wizard Summary‘and verify the details and click on ‘Finish. ‘
15. A Certificate with Private Key Is Ready to Transfer to Other Server
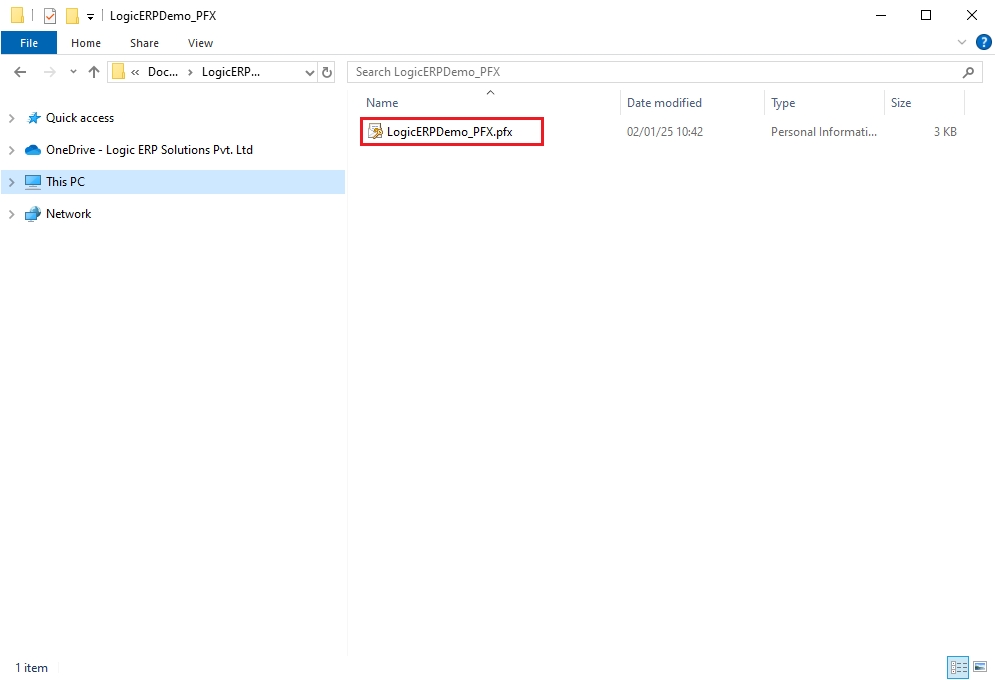
You will find the Exported Certificate with Private Key in the location (In this case, it’s the ‘Documents’ Folder).
Last updated