> For the complete documentation index, see [llms.txt](https://kb.logicerp.com/llms.txt). Markdown versions of documentation pages are available by appending `.md` to page URLs; this page is available as [Markdown](https://kb.logicerp.com/logic-erp-version-release-notes/january-2026/order-processing/gst-updates-in-sales-orders-and-printing.md).
# GST Updates in Sales Orders and Printing
**YouTube:** [2026 Release Notes : GST Updates in Sales Orders and Printing](https://www.youtube.com/watch?v=DyIHH5c4ul4)
## 2026 Release Notes: GST Updates in Sales Orders and Printing
In this tutorial, we will discuss the **new GST changes introduced in the Sales Order module in Logic ERP** and understand how to enable tax fields, apply taxes, and display tax details in printing.
***
### Enable Tax Region and Tax Fields
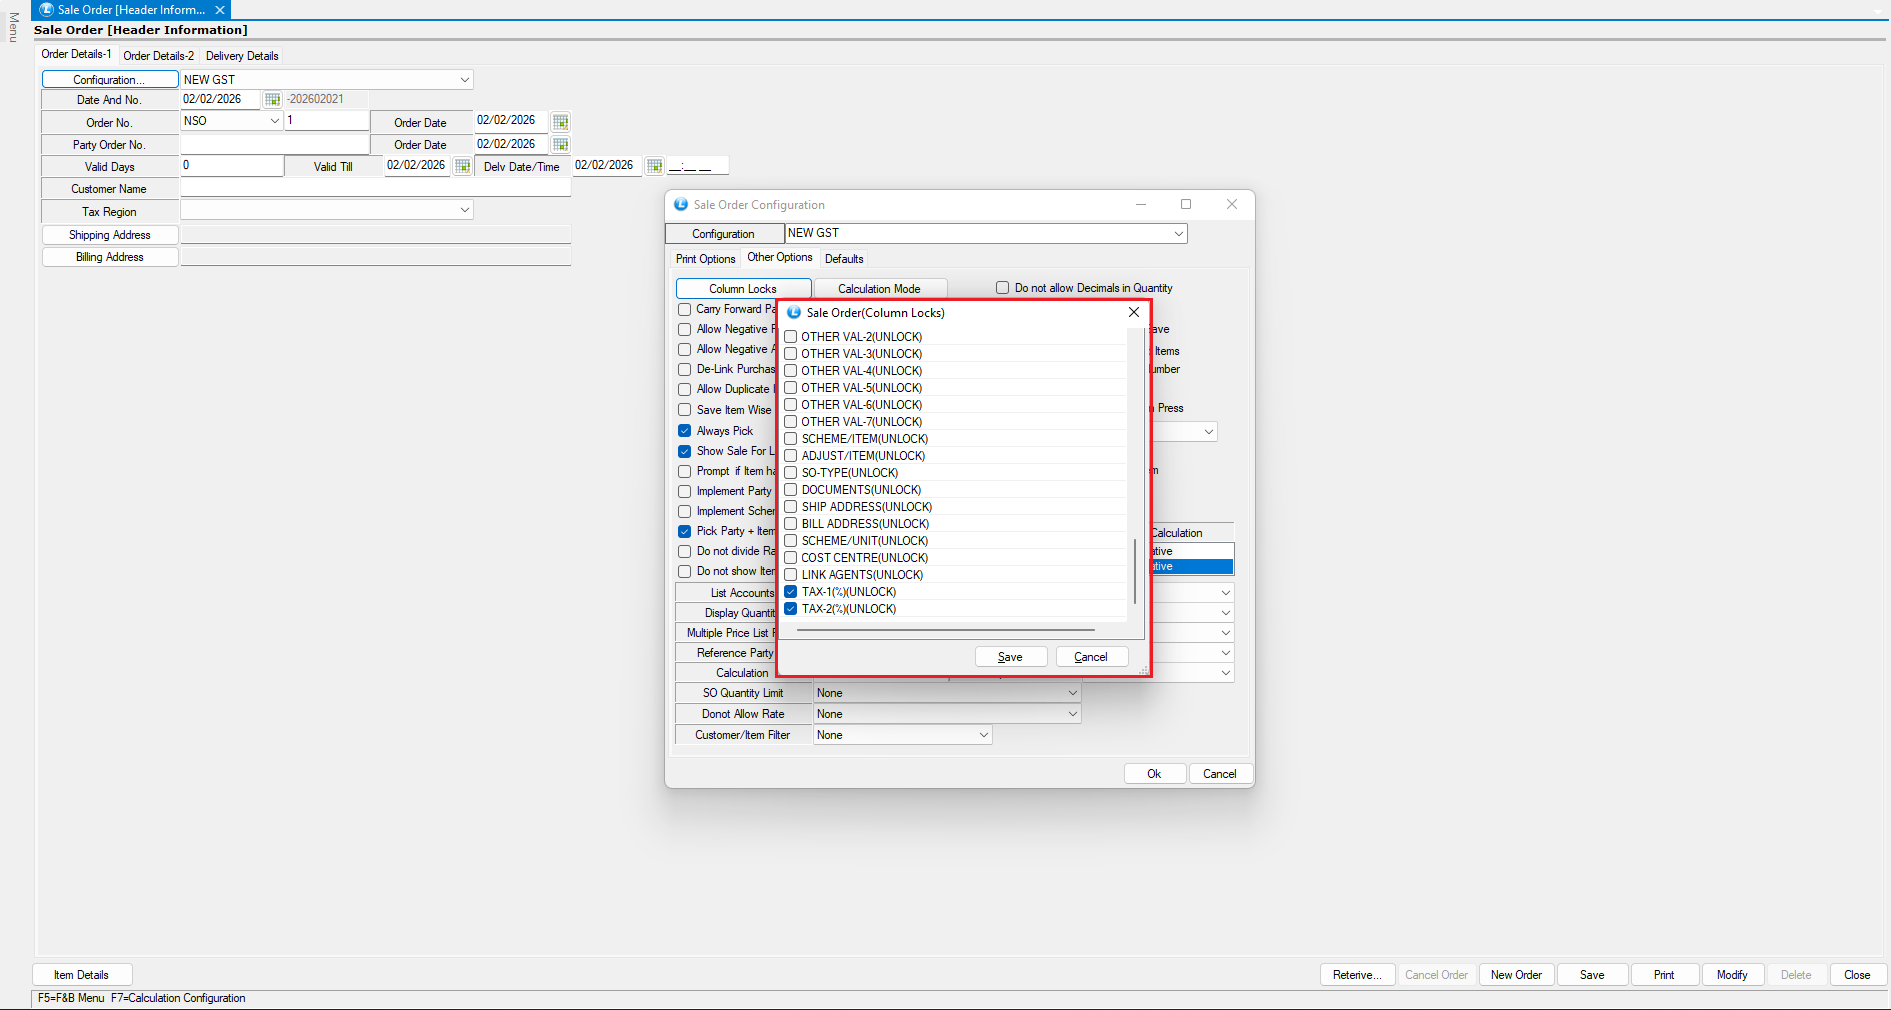
* Open the **Sales Order Configuration** window.
* Navigate to **Other Options → Column Locks**.
* Enable the following options:
* **Tax Region**
* **Tax Percentage**
* **Tax 1**
* **Tax 2**
* Save the configuration.
* Now, create a **new Sales Order**, and you will be able to see the **Tax Region** field.
* Enter the **Customer Name**.
* Select the applicable **Tax Region**.
* Proceed to the **Item Details** section.
***
### Enable Tax Columns in Item Grid
* Open **Set Up Column Attributes** in the item grid.
* Scroll down to the bottom of the list where the **new tax fields** are available.
* Enable the following:
* **Tax Percentage for SGST**
* **Tax 1 for CGST**
* Corresponding **Tax Amount** columns
* You can:
* Rename column headers
* Modify column text
* Rearrange the column order as required
* Save the changes.
***
### Transact the Item
* Enter the item details.
* As observed, the **tax percentage and tax amount columns** now display GST calculations correctly.
* Verify the tax values and **save the Sales Order**.
***
### Add Tax Details in Sales Order Printing
**Open Print Designer**
* Go to the menu bar under **Continuous Printing**.
* Open **Sales Order Print Designer & Printing**.
* Search and select **Sales Order**, then click **Refresh**.
**Insert Tax Columns in Item Table**
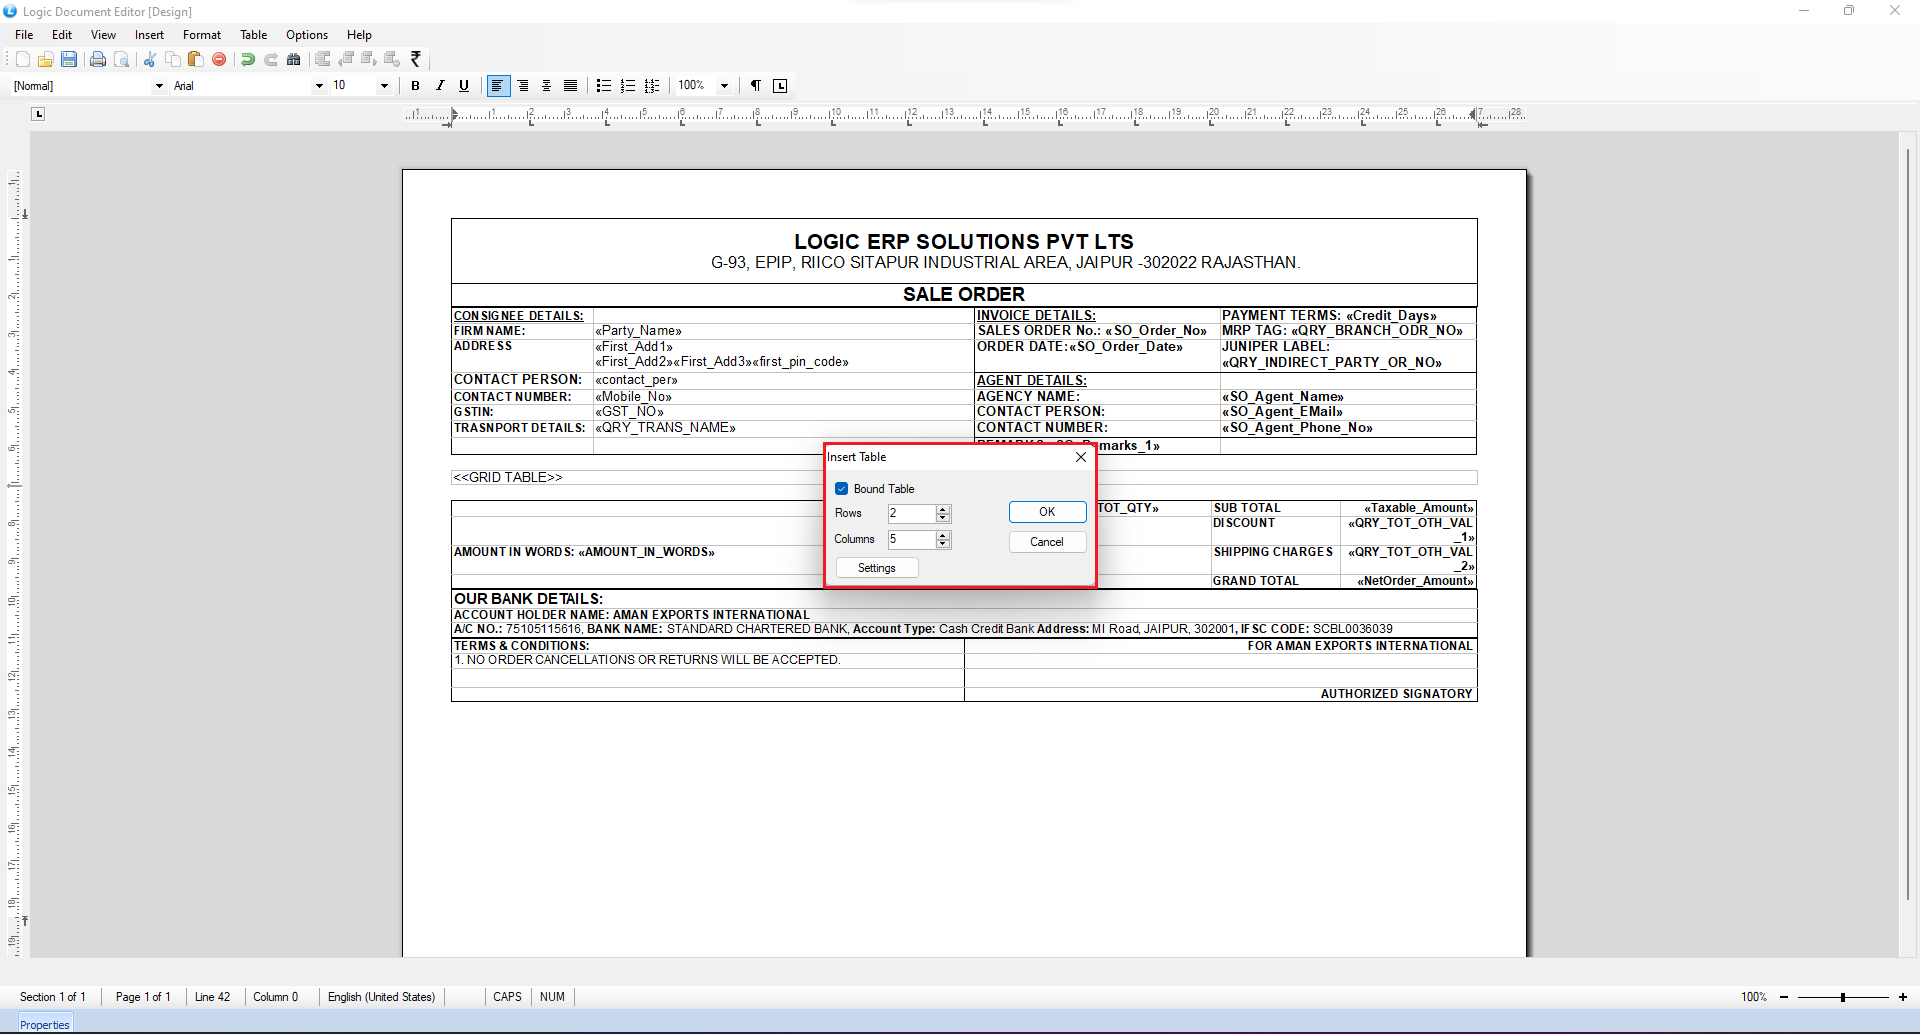
* Open the **Design** window.
* From the **Table Menu**, click **Edit Bound Table → Open Settings**.
* Click **Add Column**.
* From the bound columns list, search and add:
* **Tax 1 Percentage & Amount**
* **Tax 3 Percentage & Amount**
* Open **Column Properties**:
* Rename header text
* Set font size and alignment
* Adjust column positioning as required
* Click **OK** to save the changes.
***
### Add Tax Details in Footer Section
* Insert new rows in the table footer.
* Open the **Properties** panel at the bottom.
* Locate the **Tax Details Table**.
* Insert the required tax fields into the grid.
***
### Preview and Verify
* Save the print layout.
* Click on **Preview**.
* As shown, the **GST tax details are now correctly displayed** in the Sales Order print.
***
### Conclusion
With this update:
* GST fields can be dynamically enabled in Sales Orders
* Tax calculations are clearly visible at the item level
* Tax details can be fully customized in print formats
---
# Agent Instructions
This documentation is published with GitBook. GitBook is the documentation platform designed so that both humans and AI agents can read, navigate, and reason over technical content effectively. Learn more at gitbook.com.
## Querying This Documentation
If you need additional information that is not directly available in this page, you can query the documentation dynamically by asking a question.
Perform an HTTP GET request on the current page URL with the `ask` query parameter, and the optional `goal` query parameter:
```
GET https://kb.logicerp.com/logic-erp-version-release-notes/january-2026/order-processing/gst-updates-in-sales-orders-and-printing.md?ask=&goal=
```
`ask` is the immediate question: it should be specific, self-contained, and written in natural language.
`goal` is optional and describes the broader end goal you are ultimately trying to accomplish on behalf of the user. GitBook uses it to tailor the answer towards what is most useful for that goal.
The response will contain a direct answer to the question and relevant excerpts and sources from the documentation.
Use this mechanism when the answer is not explicitly present in the current page, you need clarification or additional context, or you want to retrieve related documentation sections.