> For the complete documentation index, see [llms.txt](https://kb.logicerp.com/llms.txt). Markdown versions of documentation pages are available by appending `.md` to page URLs; this page is available as [Markdown](https://kb.logicerp.com/logic-erp-learning-hub-tutorials-and-best-practices/setups/set-other-account-details/setup-branch-+-party-+-company-wise-credit-limit.md).
# Setup Branch + Party + Company Wise Credit Limit
**YouTube:** [How to Set Up Branch-, Party-, and Brand-Wise Credit Limits for Sales?](https://youtu.be/KlZg2wkRaD8)
## How to Set Up Branch- , Party- , and Brand -Wise Credit Limits for Sales?
In this tutorial, you will learn how to **set and enforce credit limit restrictions** based on **Branch + Party + Company** in Logic ERP.\
This feature helps control **customer outstanding balances and reduces financial risk**.
***
### Open Credit Limit Setup
**To begin:**
* Navigate to the **Setup Module**
* Click on **Set Other Account Details**
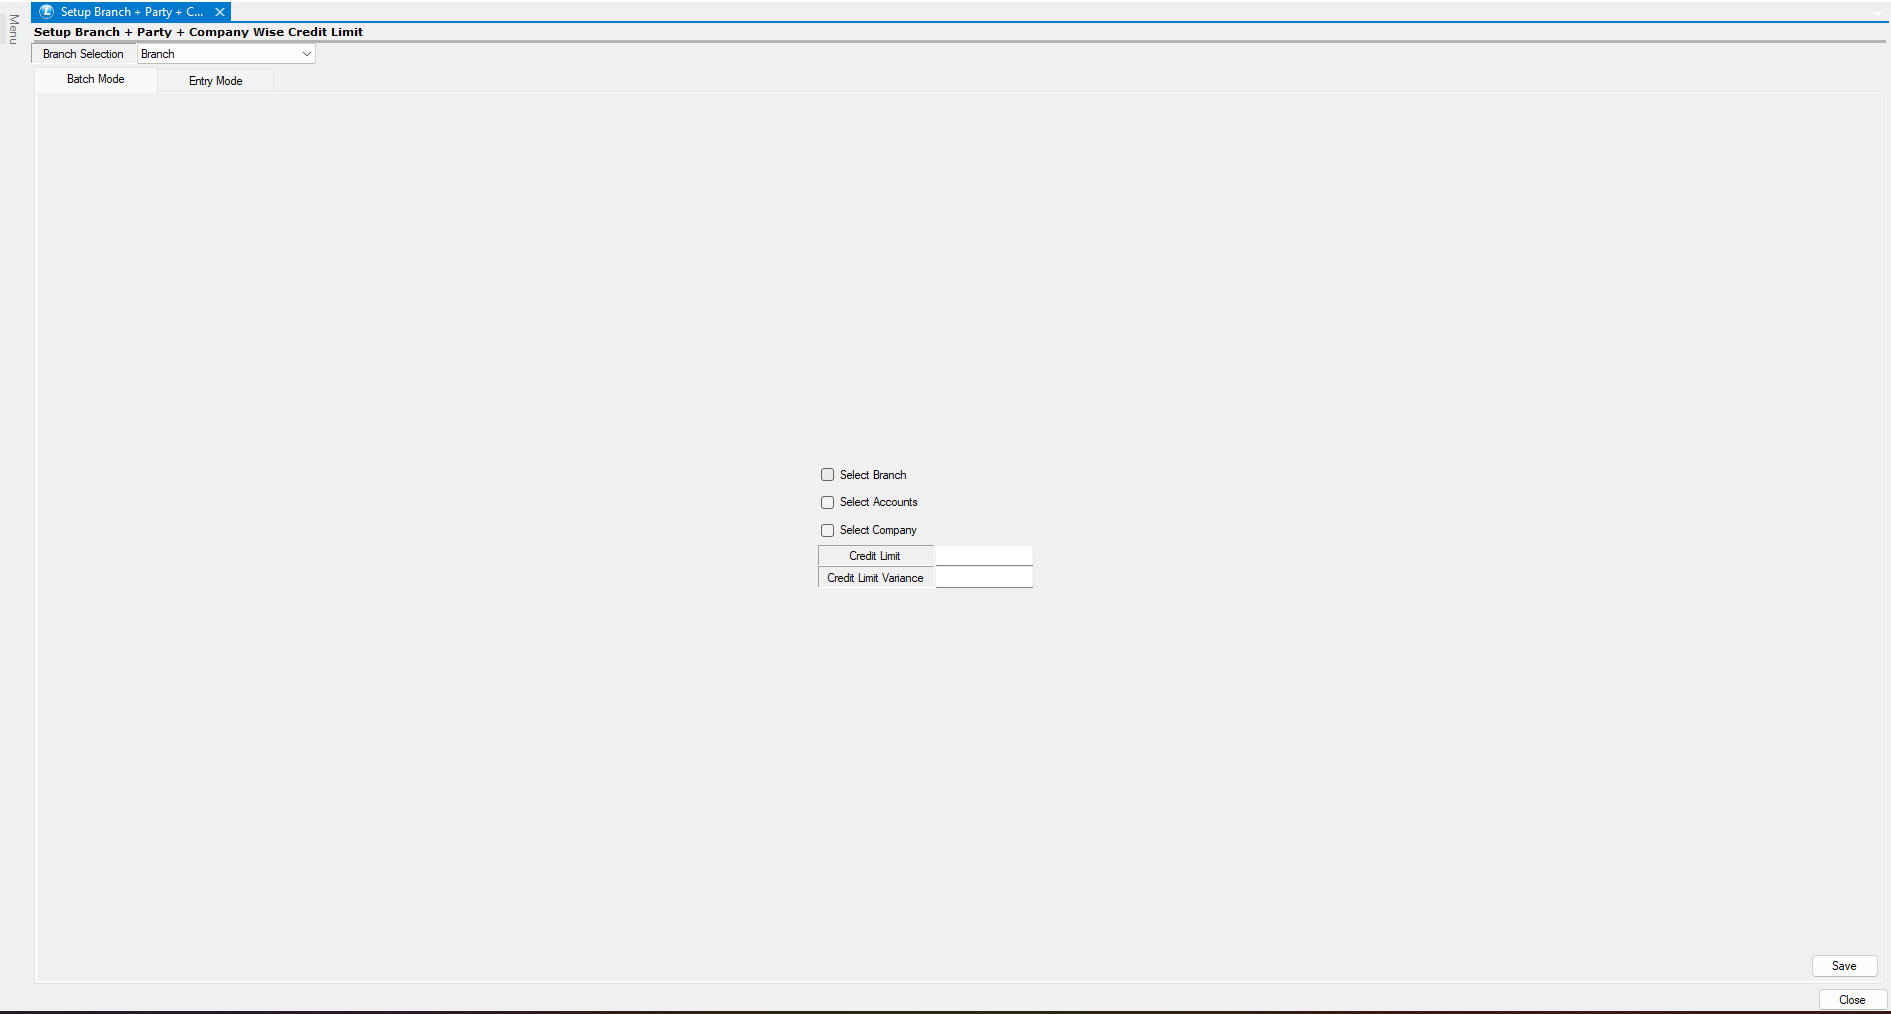
* Open **Setup Branch + Party + Company Wise Credit Limit**
This window allows you to define **credit limits for specific customer-company combinations**.
***
### Select Branch, Party & Company
* Choose the **Branch**
* Select the **Customer Account (Party)**
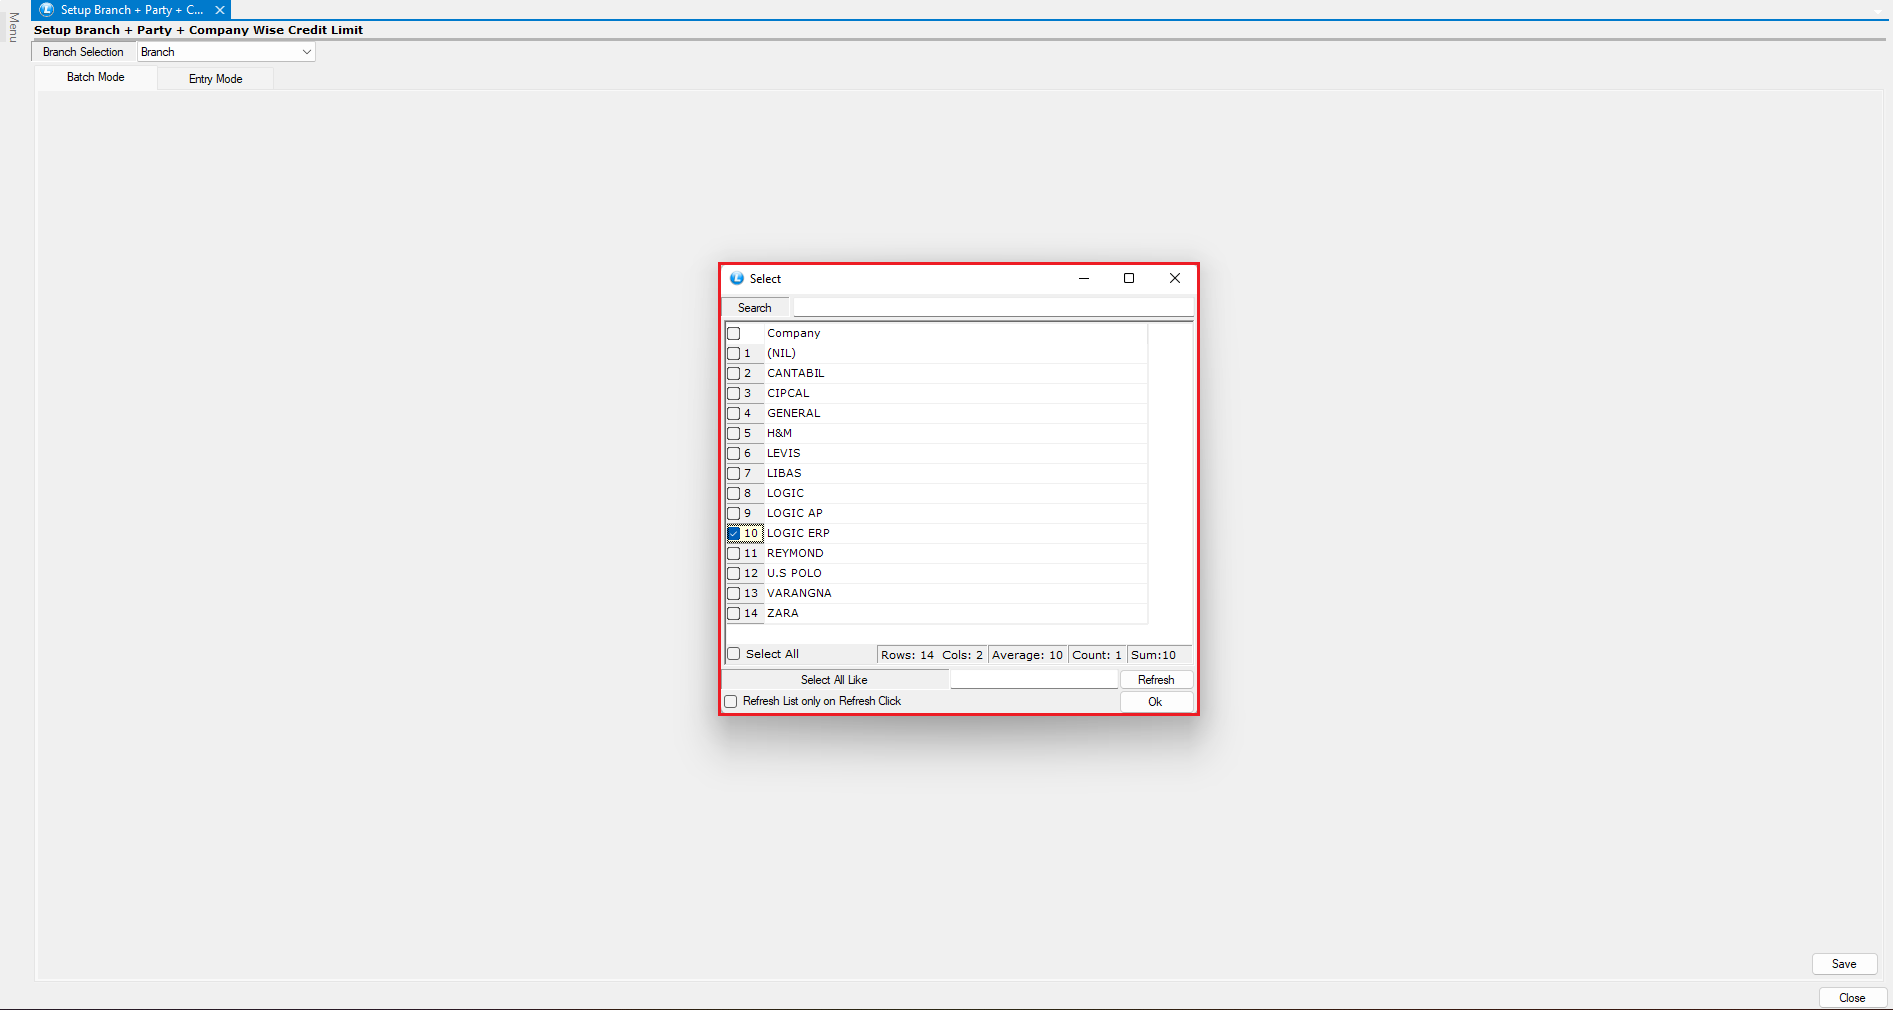
* Select the **Company**
Credit limits will apply only to this **specific combination**.
***
### Define Credit Limit & Variance
Enter the following:
* **Credit Limit** → Maximum allowed outstanding amount
* **Credit Limit Variance (%)** → Extra tolerance allowed beyond the limit
Example:
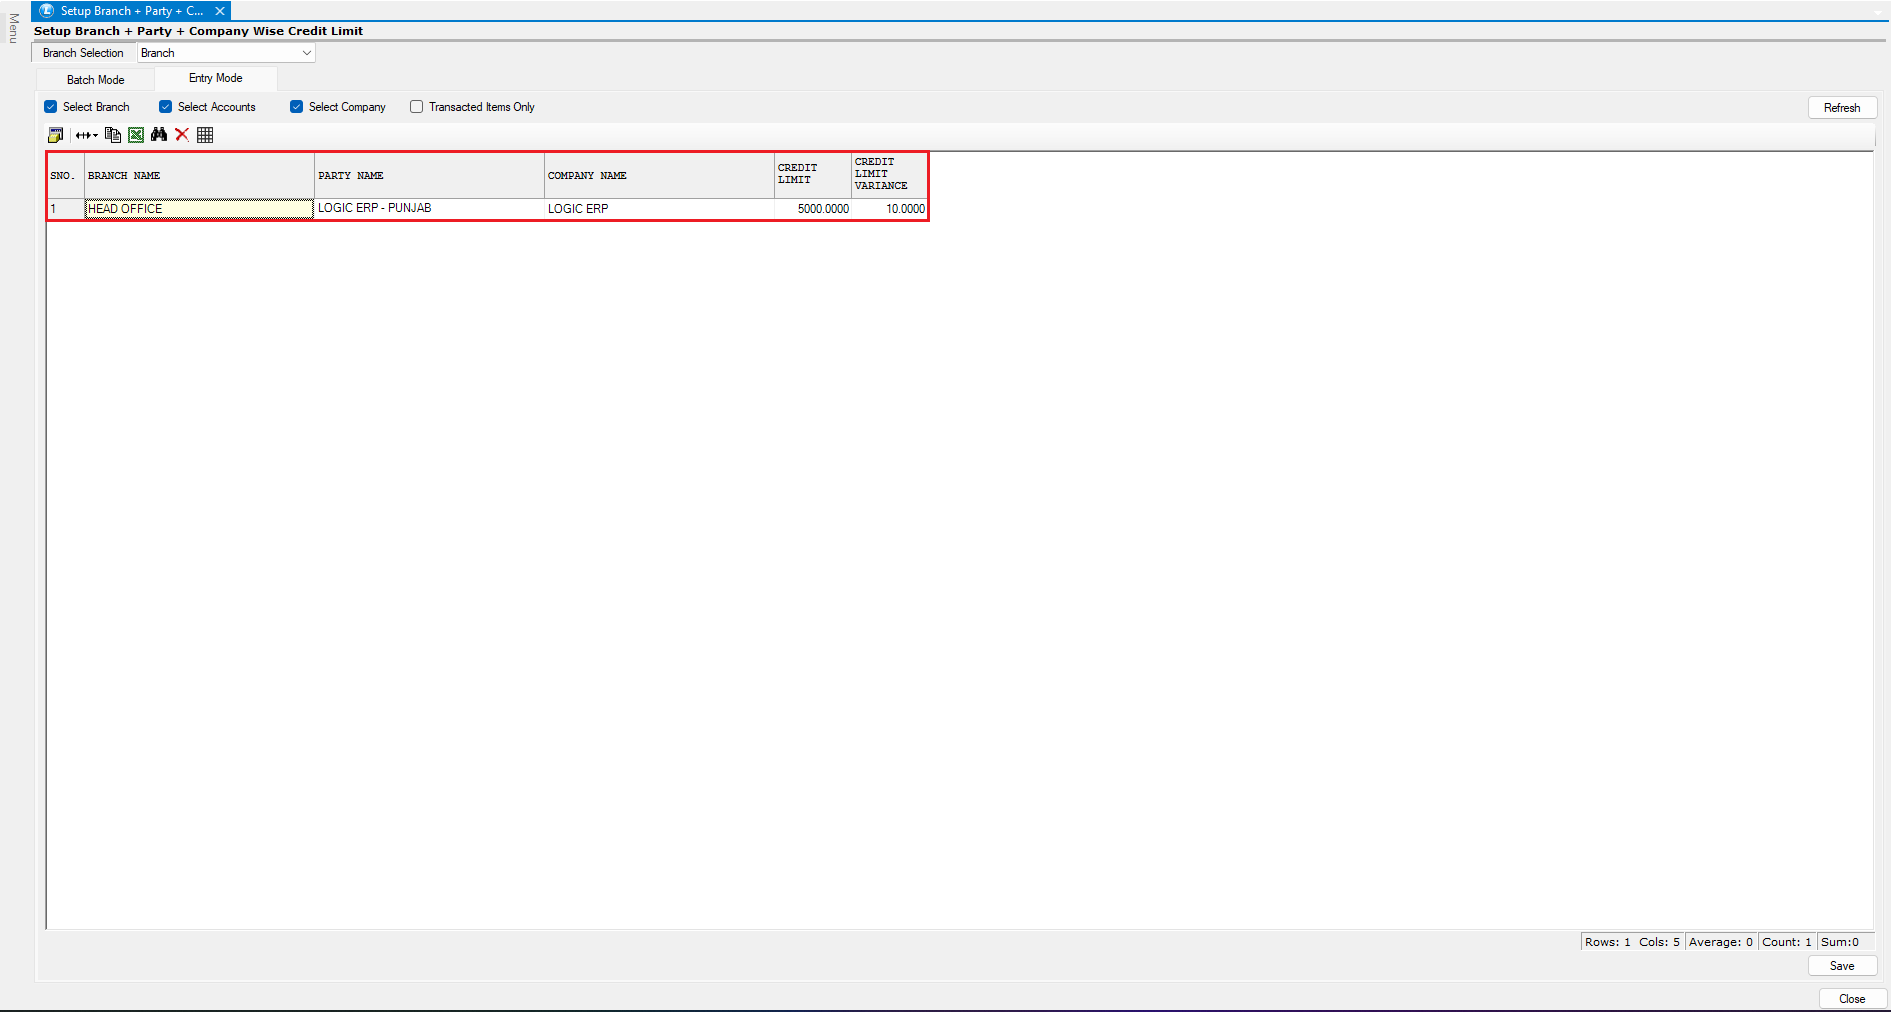
* Credit Limit = ₹5000
* Variance = 10%
* Allowed limit becomes ₹5,500
**Save & Review**
* Click **Save** to apply settings
* Review details anytime in **Entry Mode**
***
### Enable Credit Limit Validation
To activate restriction:
* Open **Logic Admin**
* Go to **Global Settings**
* Navigate to **Sales Settings 1**
**Configure Credit Limit Check:**
* Enable **Credit Limit Check**
* Choose one option:
* Check in **Next Bill**
* OR Check **Before Saving Current Bill**
* Save changes
* Restart the software
This step is mandatory to enforce validation
***
### Implement in Sales Billing
* Log in to the respective **Branch**
* Open **Sales Bill Window**
* Create a new transaction:
* Select **Customer**
* Select **Company**
* Enter items
**Credit Limit Validation**
**If Within Limit:**
* Bill saves successfully
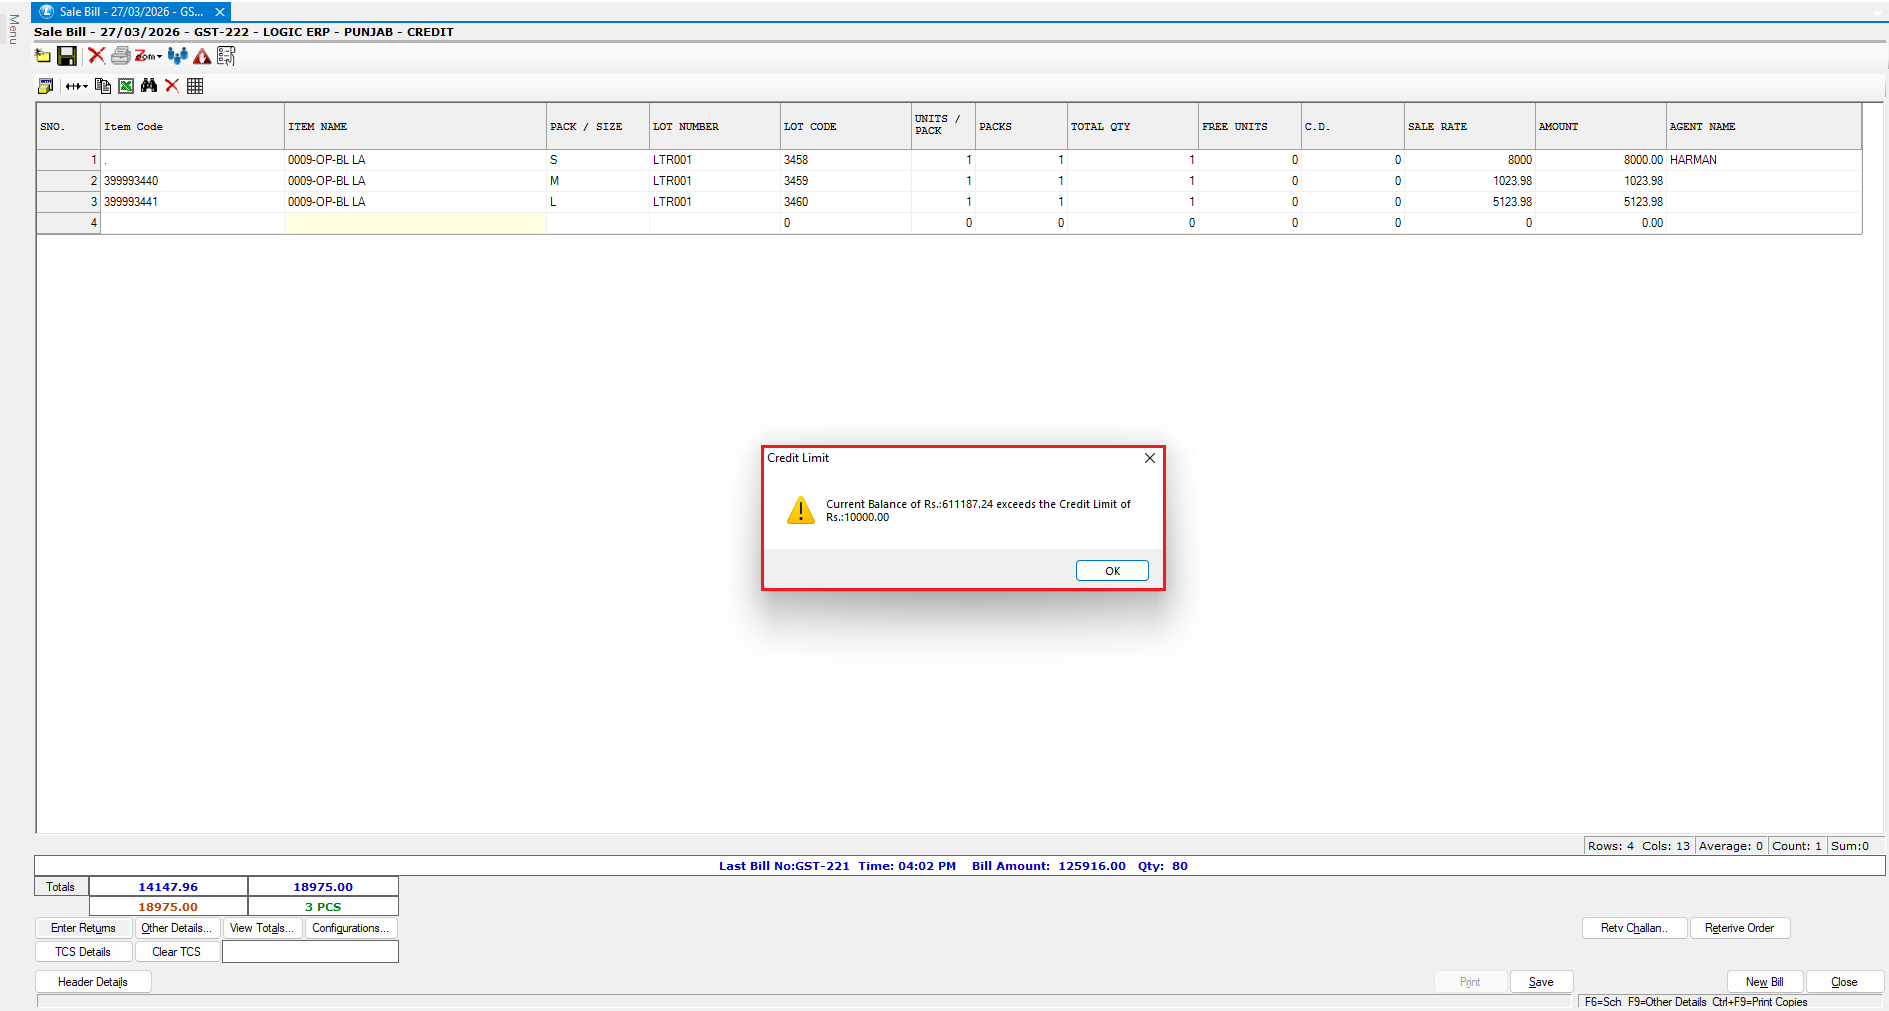
**If Limit Exceeded:**
* System restricts saving
* Displays message:
* *“Bill amount exceeds allowed credit limit”*
***
### How Credit Limit Control Works
* System checks:
* **Previous Outstanding + Current Bill**
* Compares with:
* **Credit Limit + Variance**
Restricts transaction if threshold is exceeded
***
### Key Benefits of Credit Limit Control
* Prevents excessive customer outstanding
* Reduces financial risk
* Ensures disciplined credit management
* Real-time validation during billing
* Flexible control with variance option
***
### Final Outcome
You have successfully learned how to:
* Set **Branch + Party + Company Wise Credit Limits**
* Configure **Credit Limit Variance**
* Enable **System Validation in Billing**
* Restrict transactions beyond allowed limits
Your system is now optimized for **secure and controlled credit management**.
---
# Agent Instructions
This documentation is published with GitBook. GitBook is the documentation platform designed so that both humans and AI agents can read, navigate, and reason over technical content effectively. Learn more at gitbook.com.
## Querying This Documentation
If you need additional information that is not directly available in this page, you can query the documentation dynamically by asking a question.
Perform an HTTP GET request on the current page URL with the `ask` query parameter, and the optional `goal` query parameter:
```
GET https://kb.logicerp.com/logic-erp-learning-hub-tutorials-and-best-practices/setups/set-other-account-details/setup-branch-+-party-+-company-wise-credit-limit.md?ask=&goal=
```
`ask` is the immediate question: it should be specific, self-contained, and written in natural language.
`goal` is optional and describes the broader end goal you are ultimately trying to accomplish on behalf of the user. GitBook uses it to tailor the answer towards what is most useful for that goal.
The response will contain a direct answer to the question and relevant excerpts and sources from the documentation.
Use this mechanism when the answer is not explicitly present in the current page, you need clarification or additional context, or you want to retrieve related documentation sections.