> For the complete documentation index, see [llms.txt](https://kb.logicerp.com/llms.txt). Markdown versions of documentation pages are available by appending `.md` to page URLs; this page is available as [Markdown](https://kb.logicerp.com/logic-erp-learning-hub-tutorials-and-best-practices/billing/enter-g.r.-details.md).
# Enter G.R. Details
**YouTube:** [How to Enter G.R. Details in a Sales Bill After It Has Been Created?](https://www.youtube.com/watch?v=BKjbGqsA43U)
## How to Enter G.R. Details in a Sales Bill After It Has Been Created?
In this tutorial, we will learn how to **enter G.R. (Goods Receipt) details in Logic ERP** and verify them against the relevant sales invoices.
***
### Open the Enter G.R. Details Module
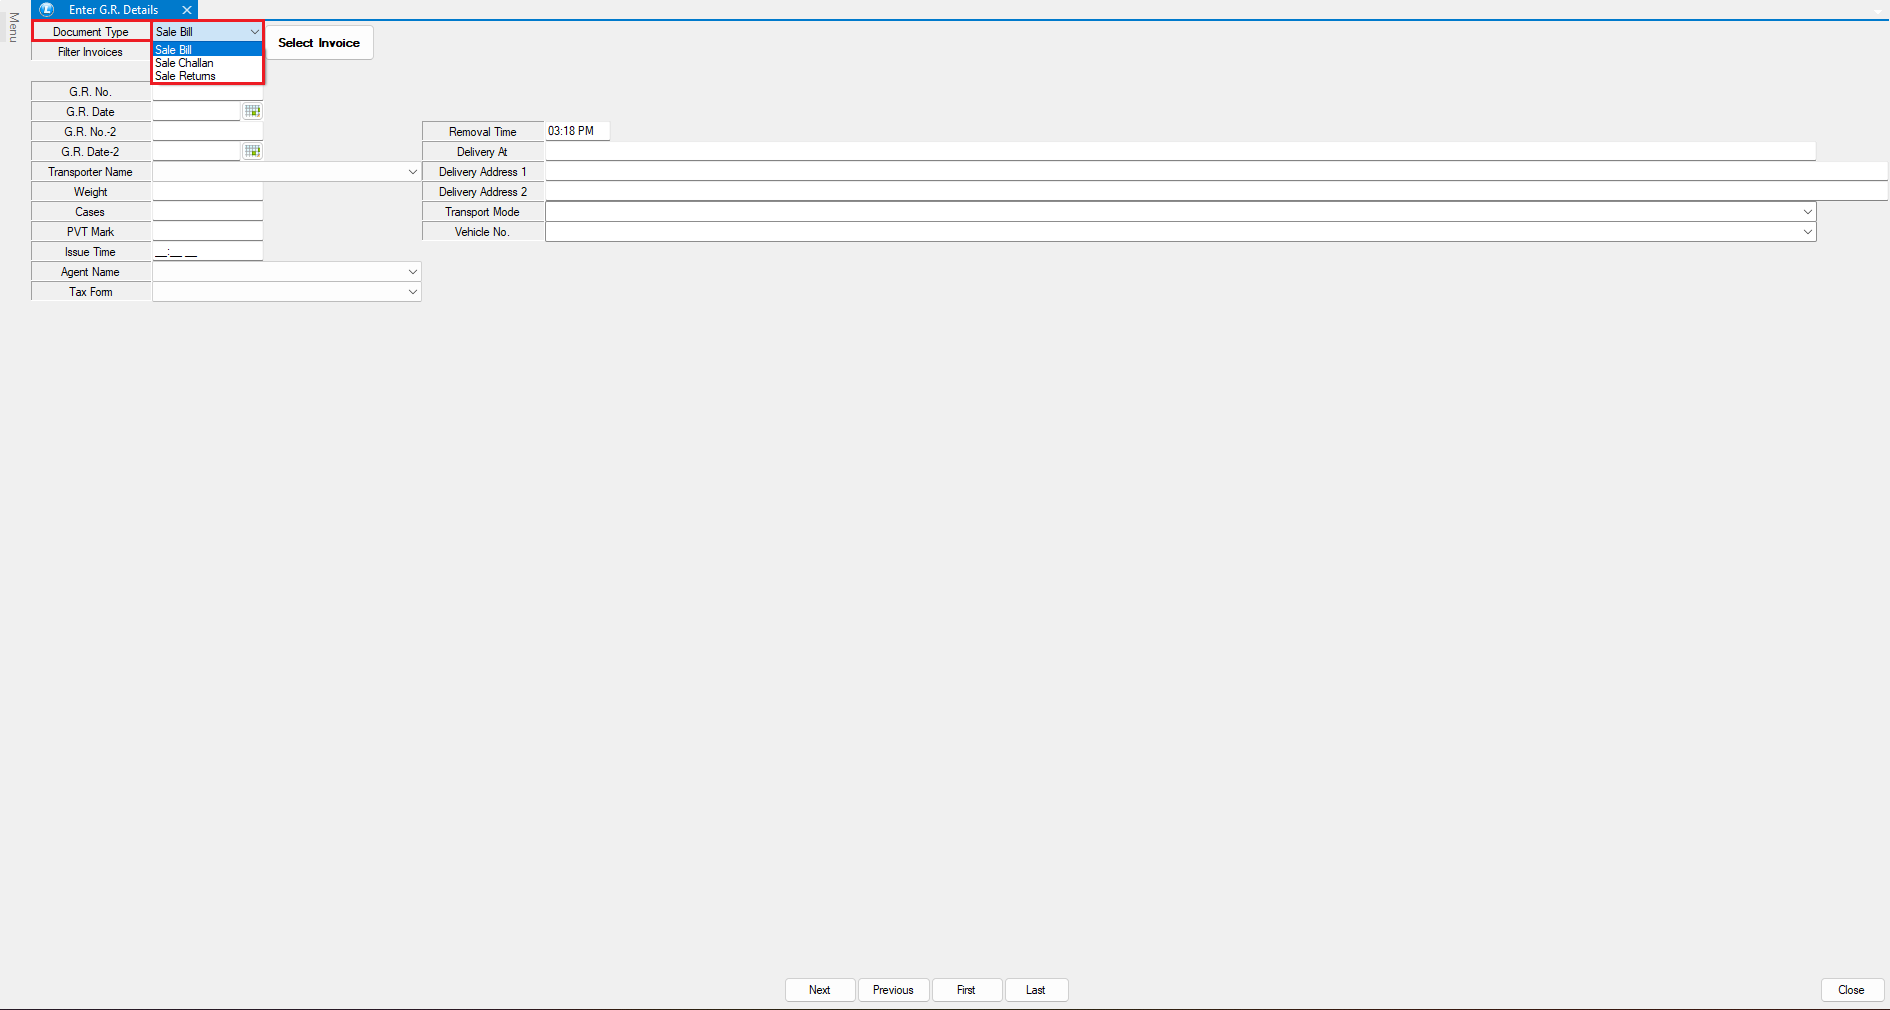
* Navigate to **Enter G.R. Details** module
* From the **Document Type** dropdown
* Select the document for which G.R. details need to be entered
* In this example, select **Sale Bill**
***
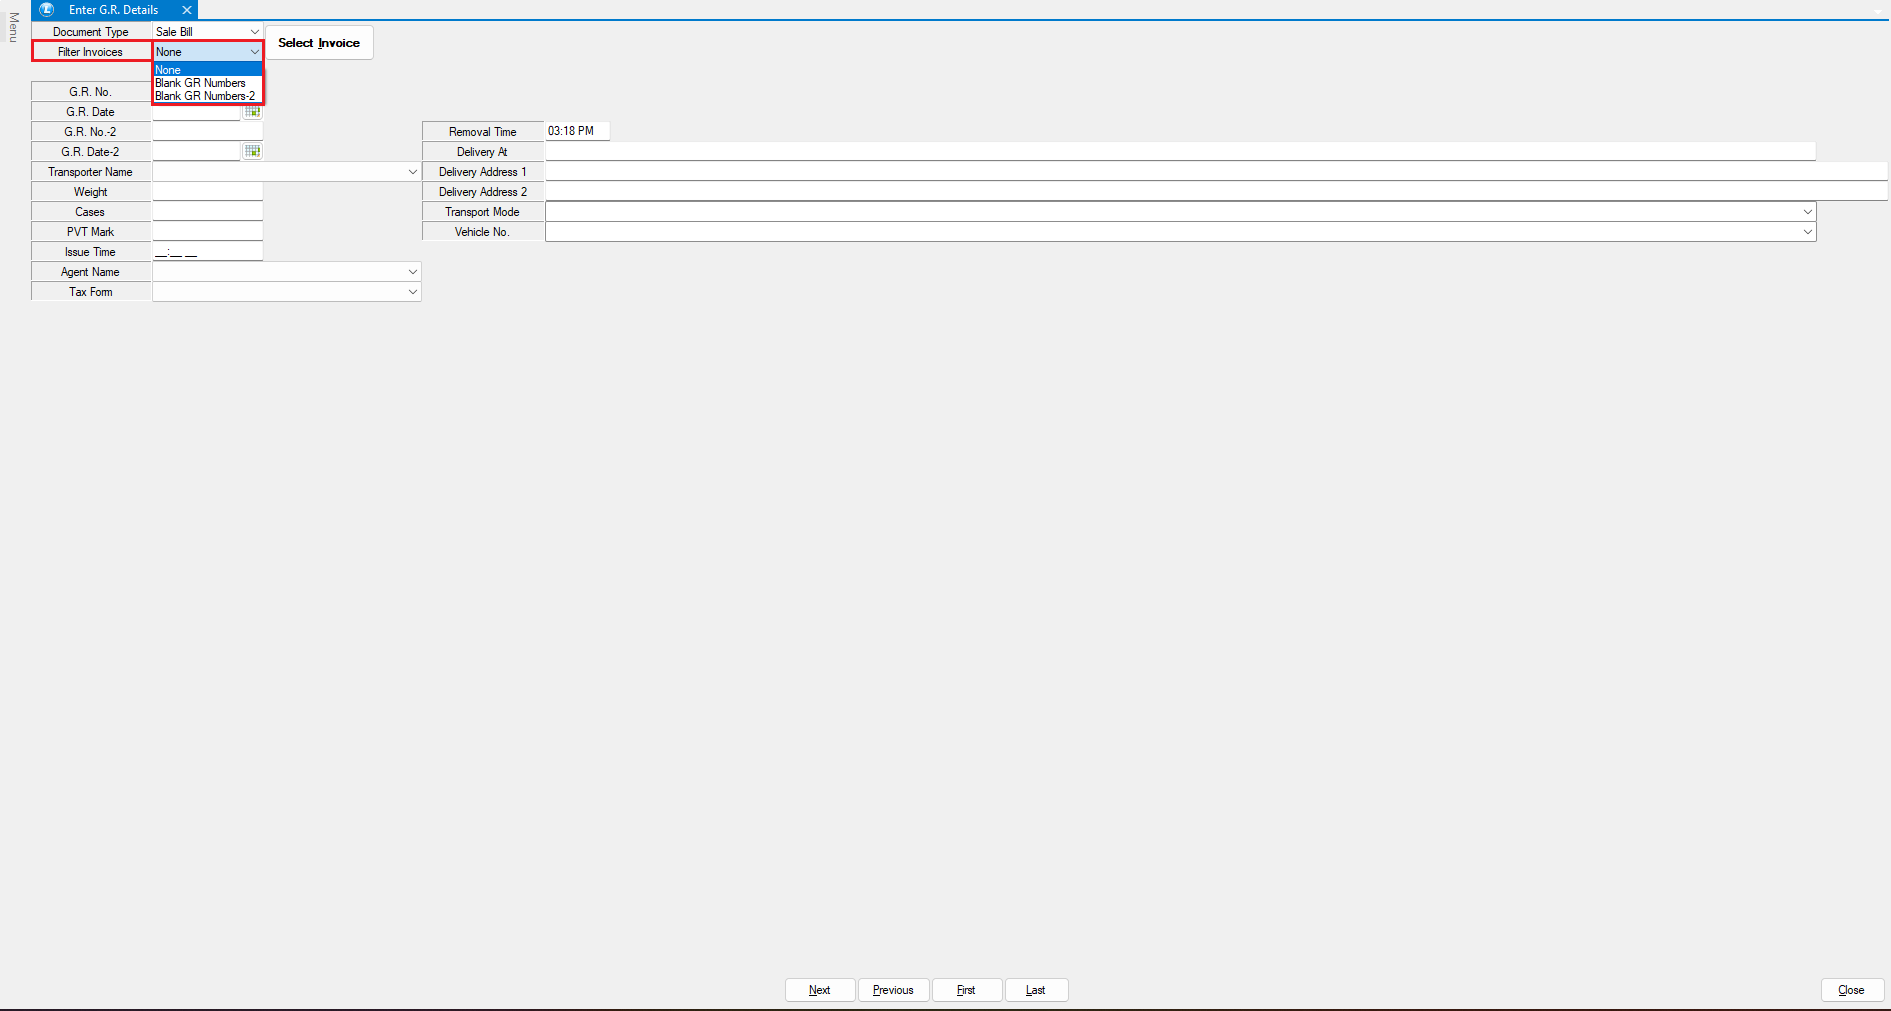
### Filter Bills with Blank G.R. Details
Logic ERP provides filters to easily identify invoices where G.R. details are missing.
* Use the available filters:
* **Blank G.R. Number**
* **Blank G.R. Number 2**
* Select **Blank G.R. Number**
* The system will display only those sale bills where G.R. details have not yet been entered
***
### Verify Bills Without G.R. Details
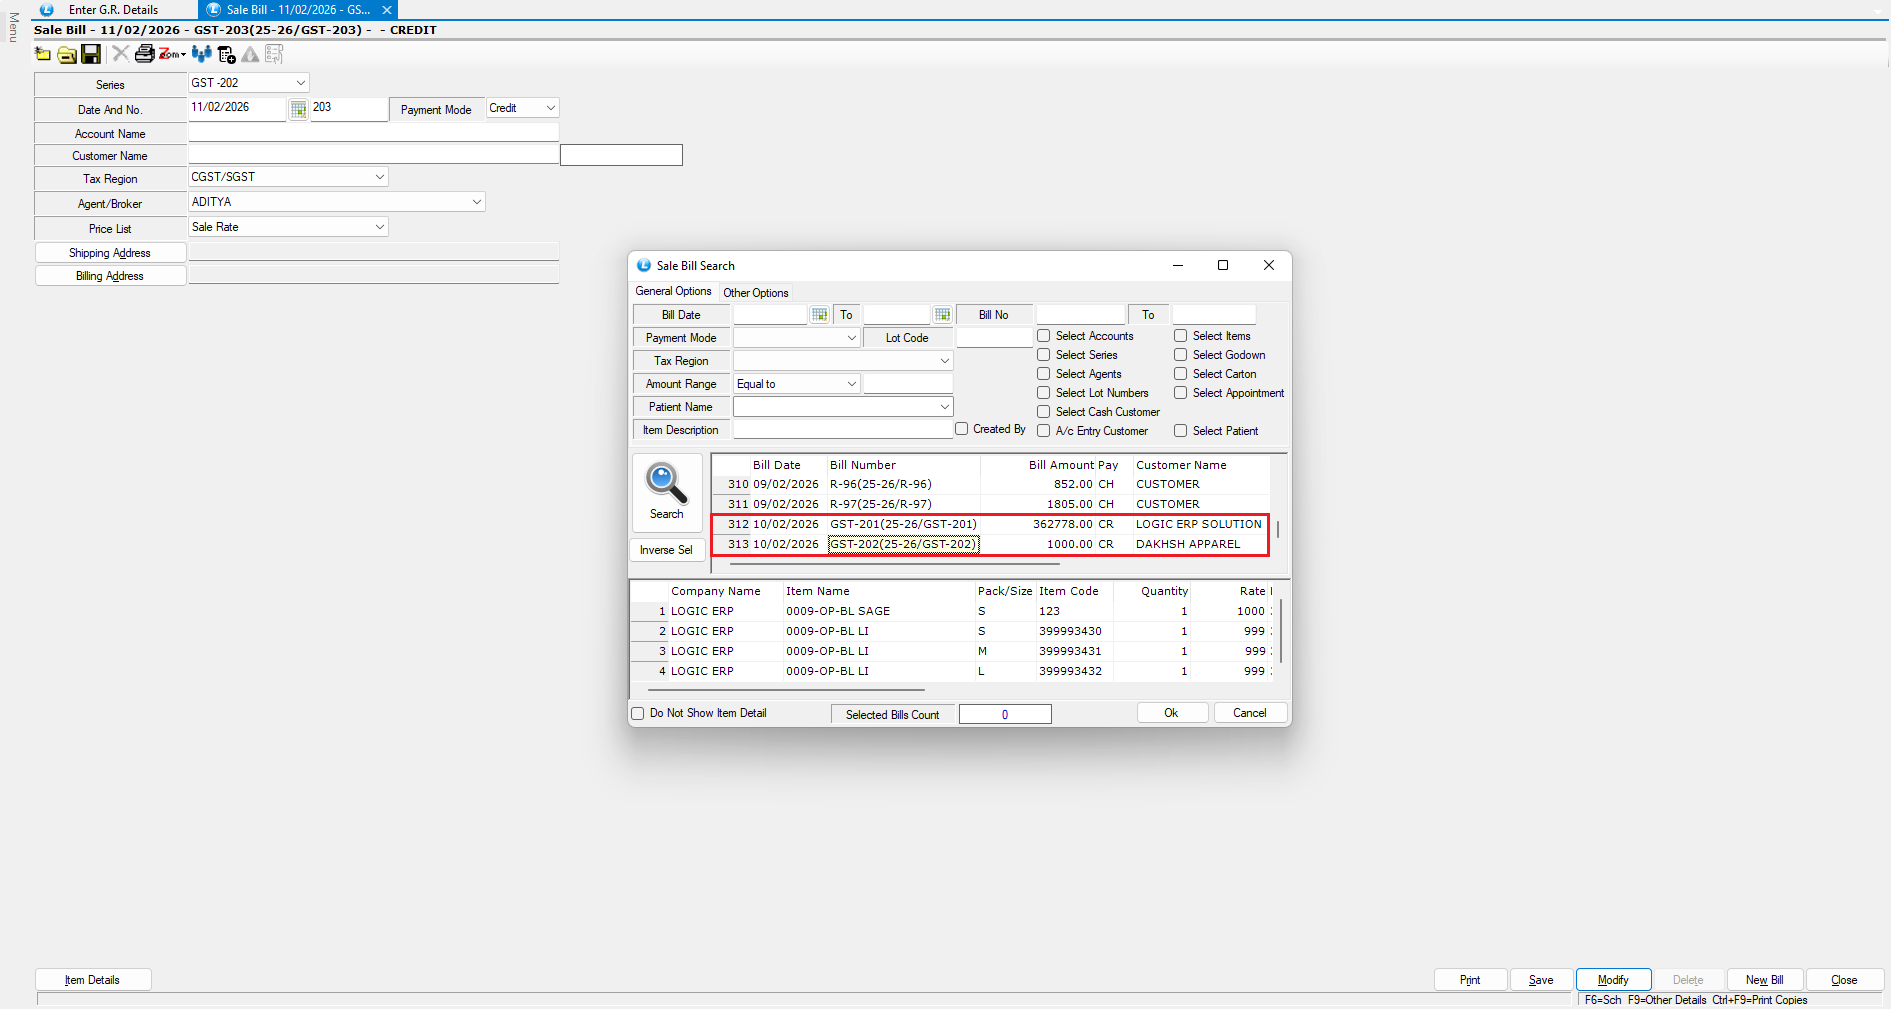
* Open the **Sale Bill Module**
* Check the last two sale bills:
* **Bill No. GST-201**
* **Bill No. GST-202**
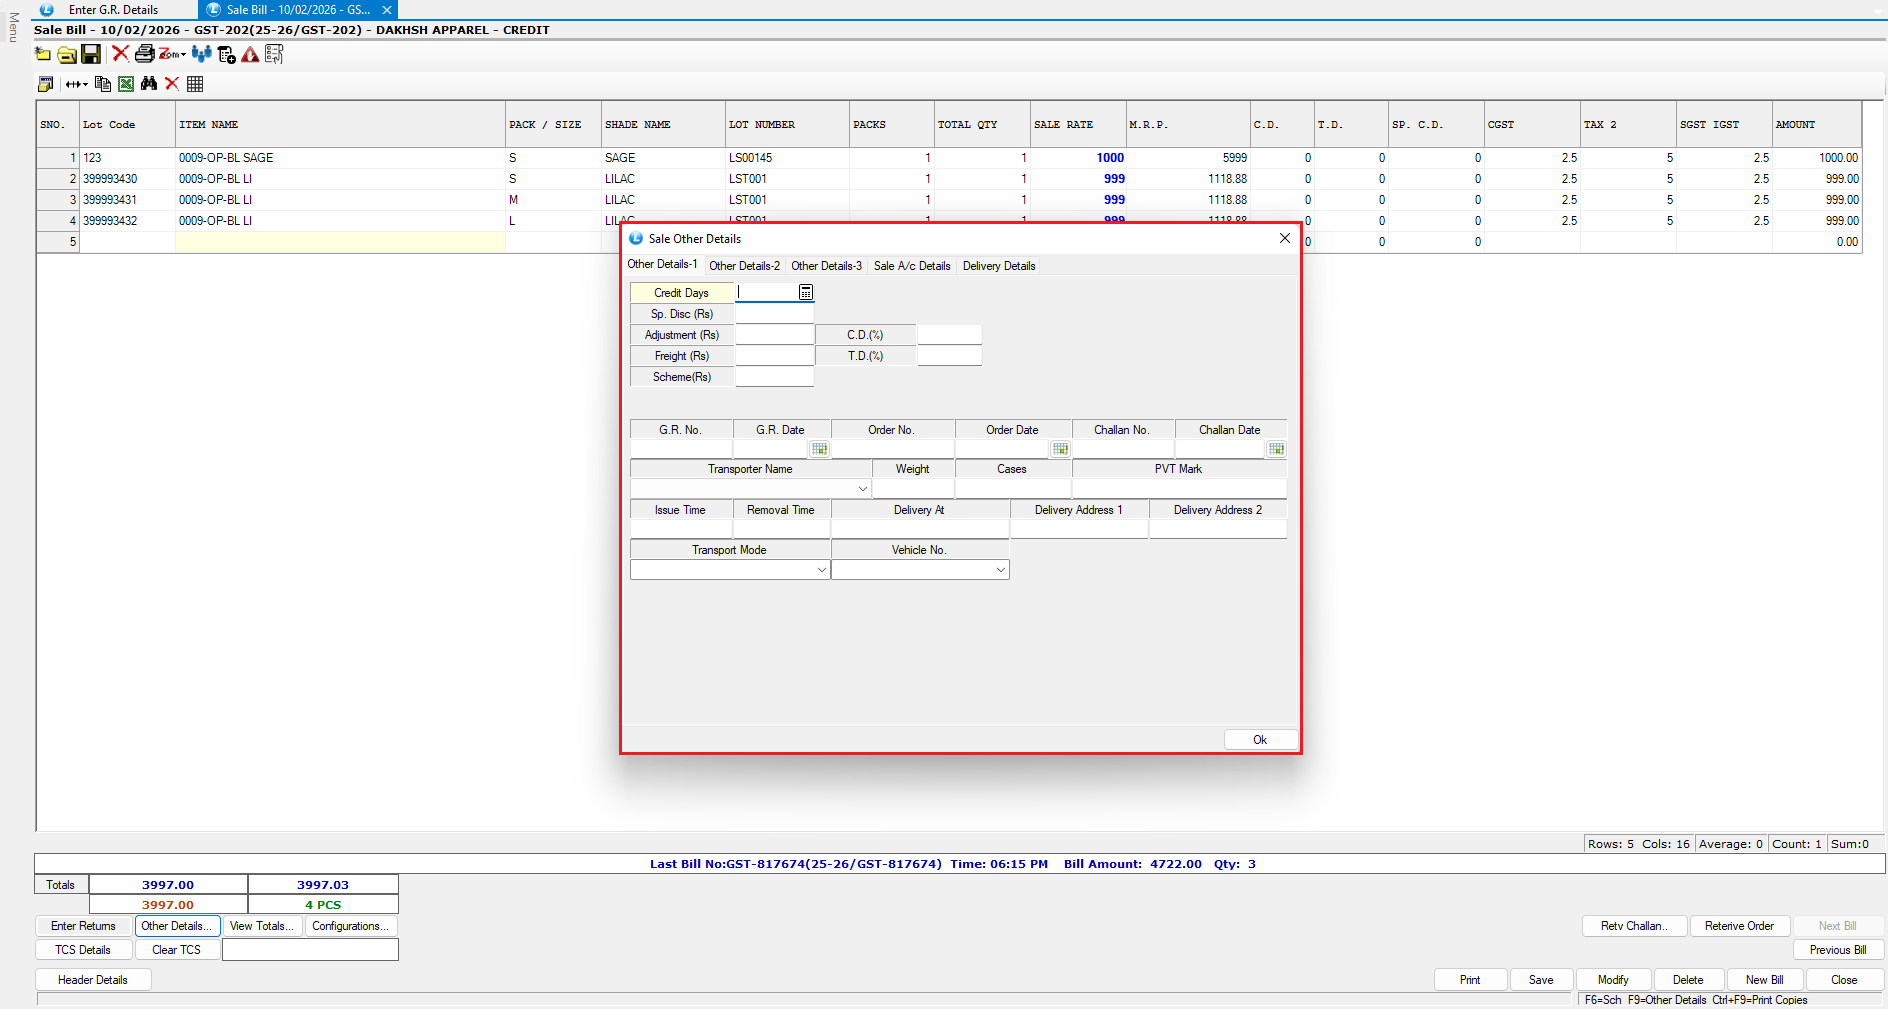
* Observe that:
* No G.R. details are currently recorded in these bills
* This confirms that the selected invoices are eligible for G.R. entry.
***
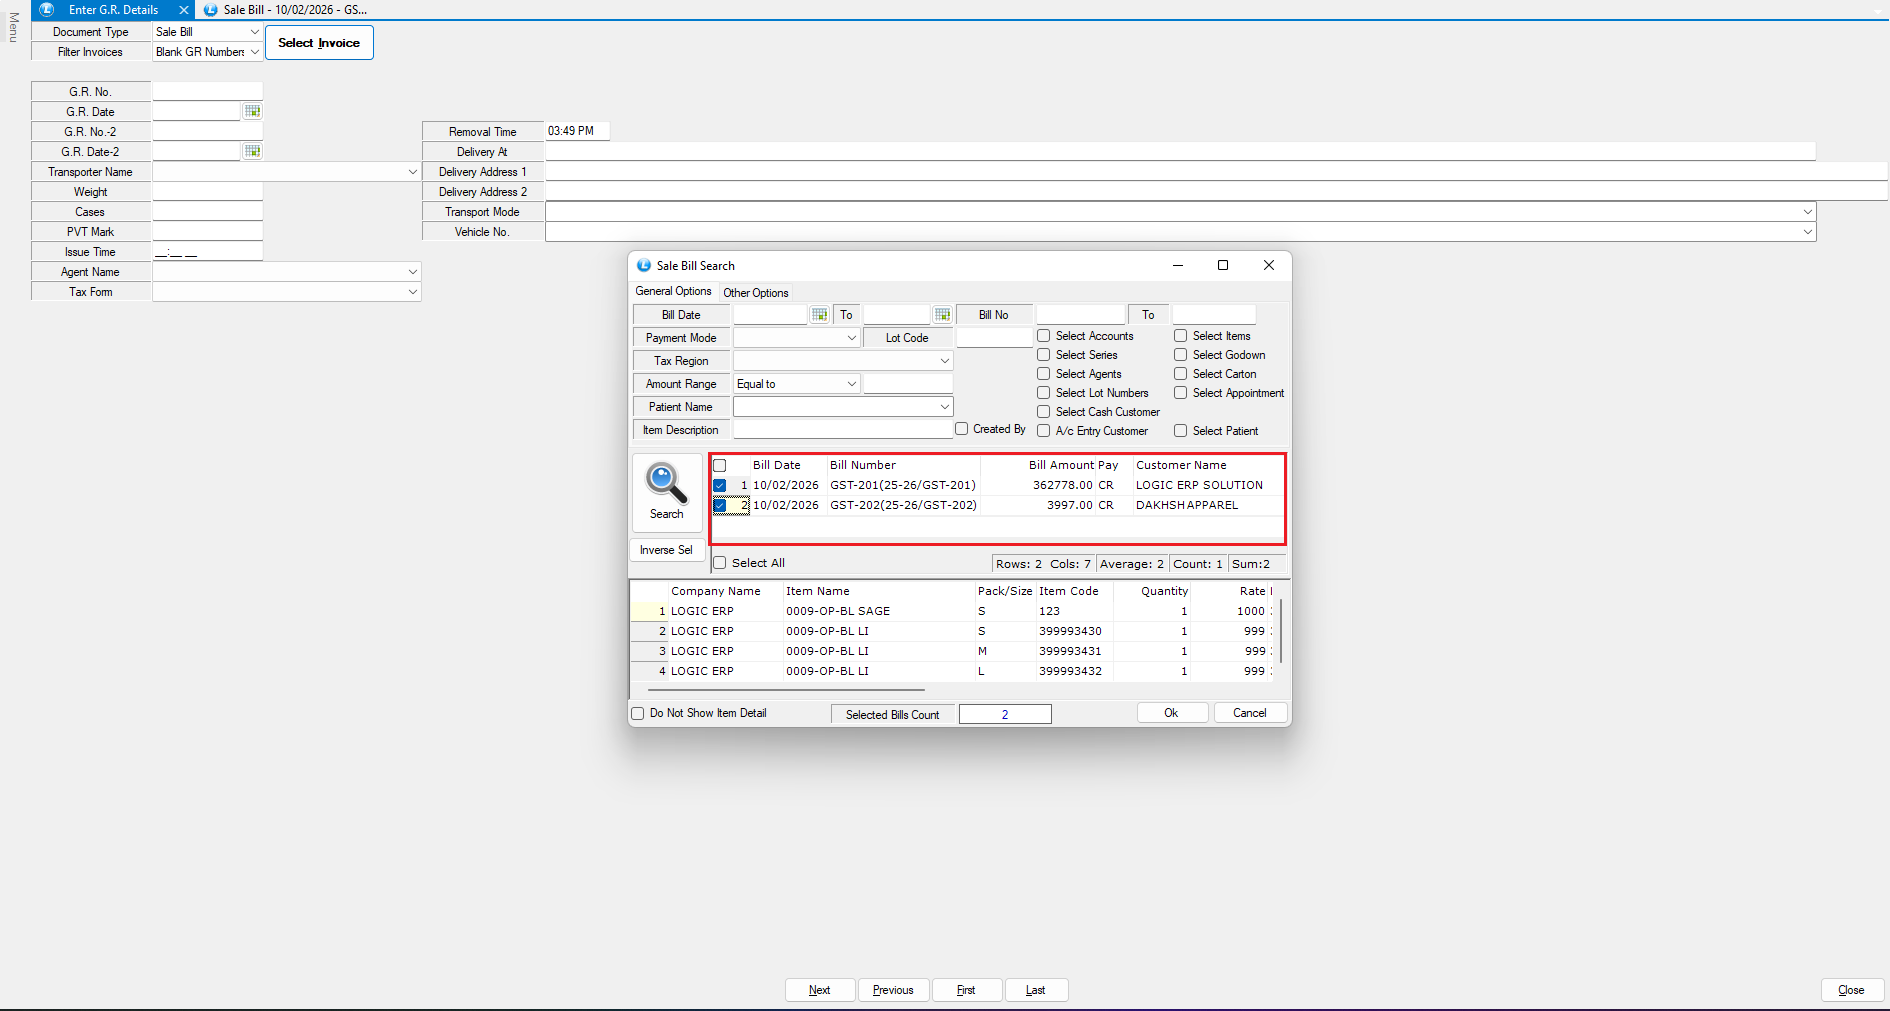
### Select Bills for G.R. Entry
* Return to the **Enter G.R. Details** window
* The system automatically lists bills with blank G.R. details
* Select both bills:
* Bill No. GST-201
* Bill No. GST-202
* Proceed to continue
***
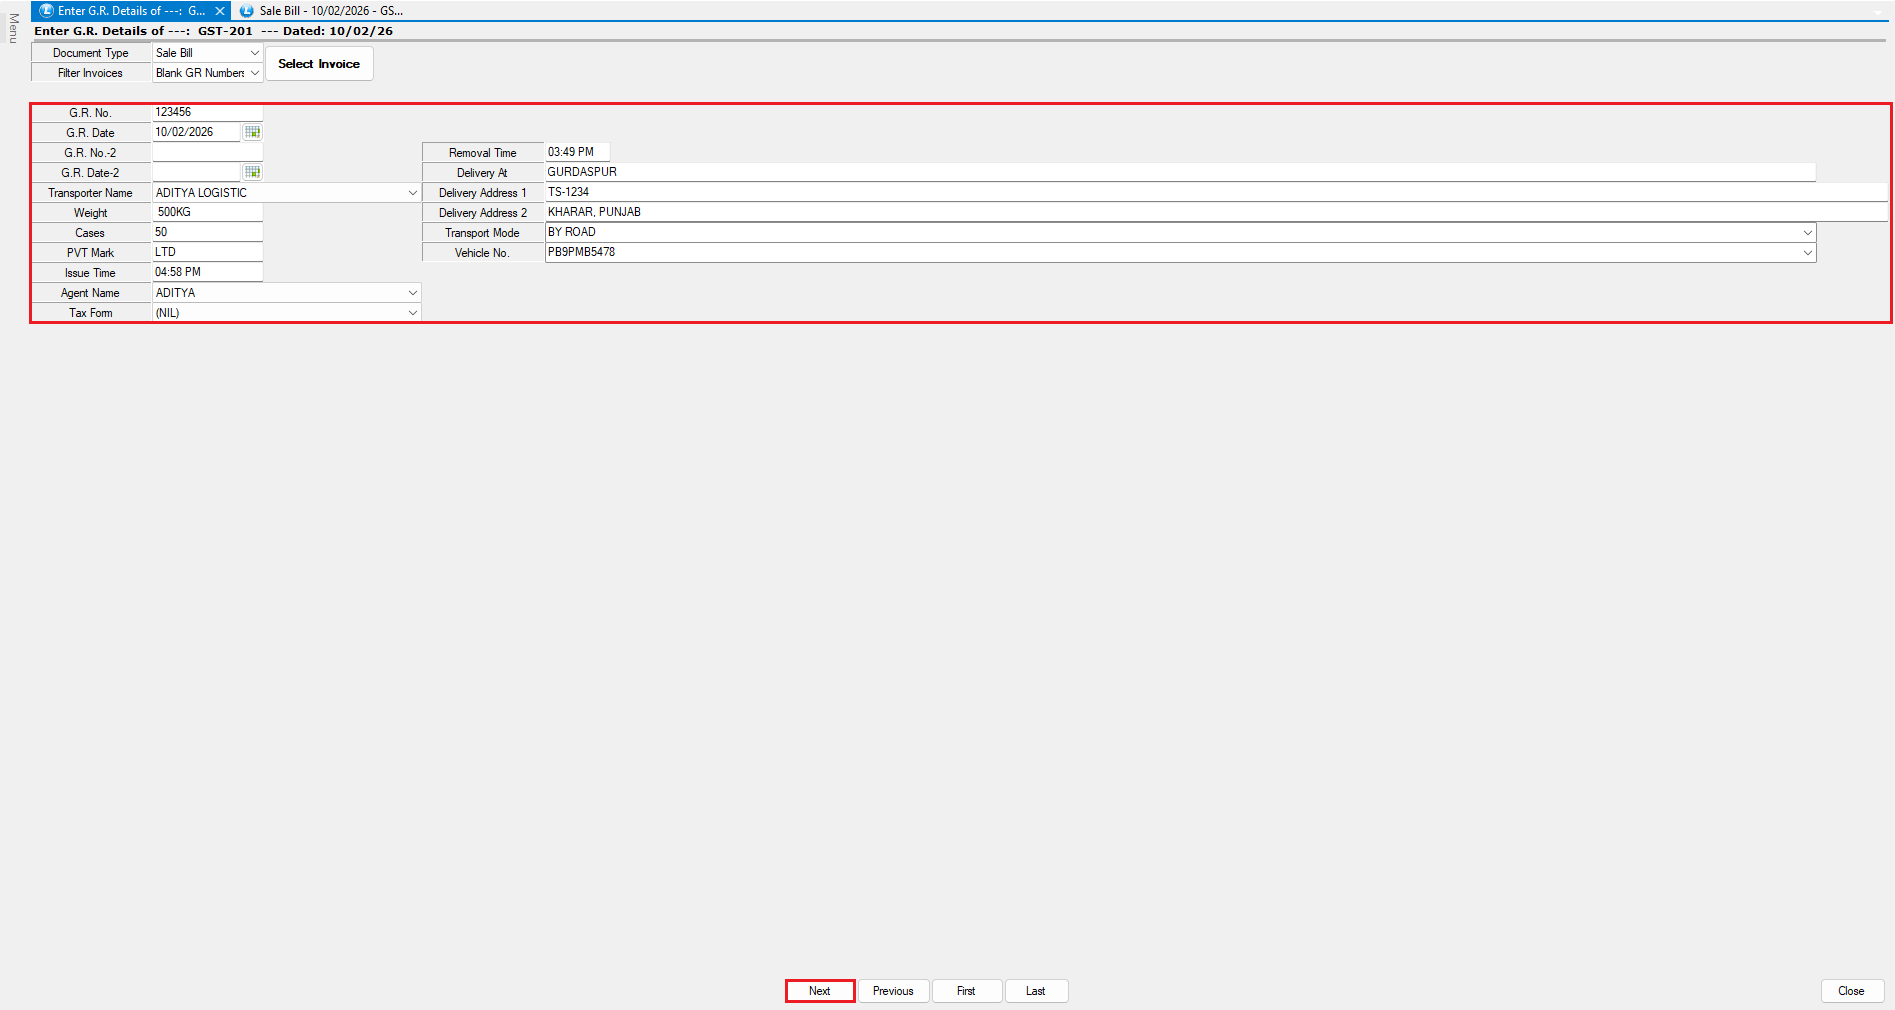
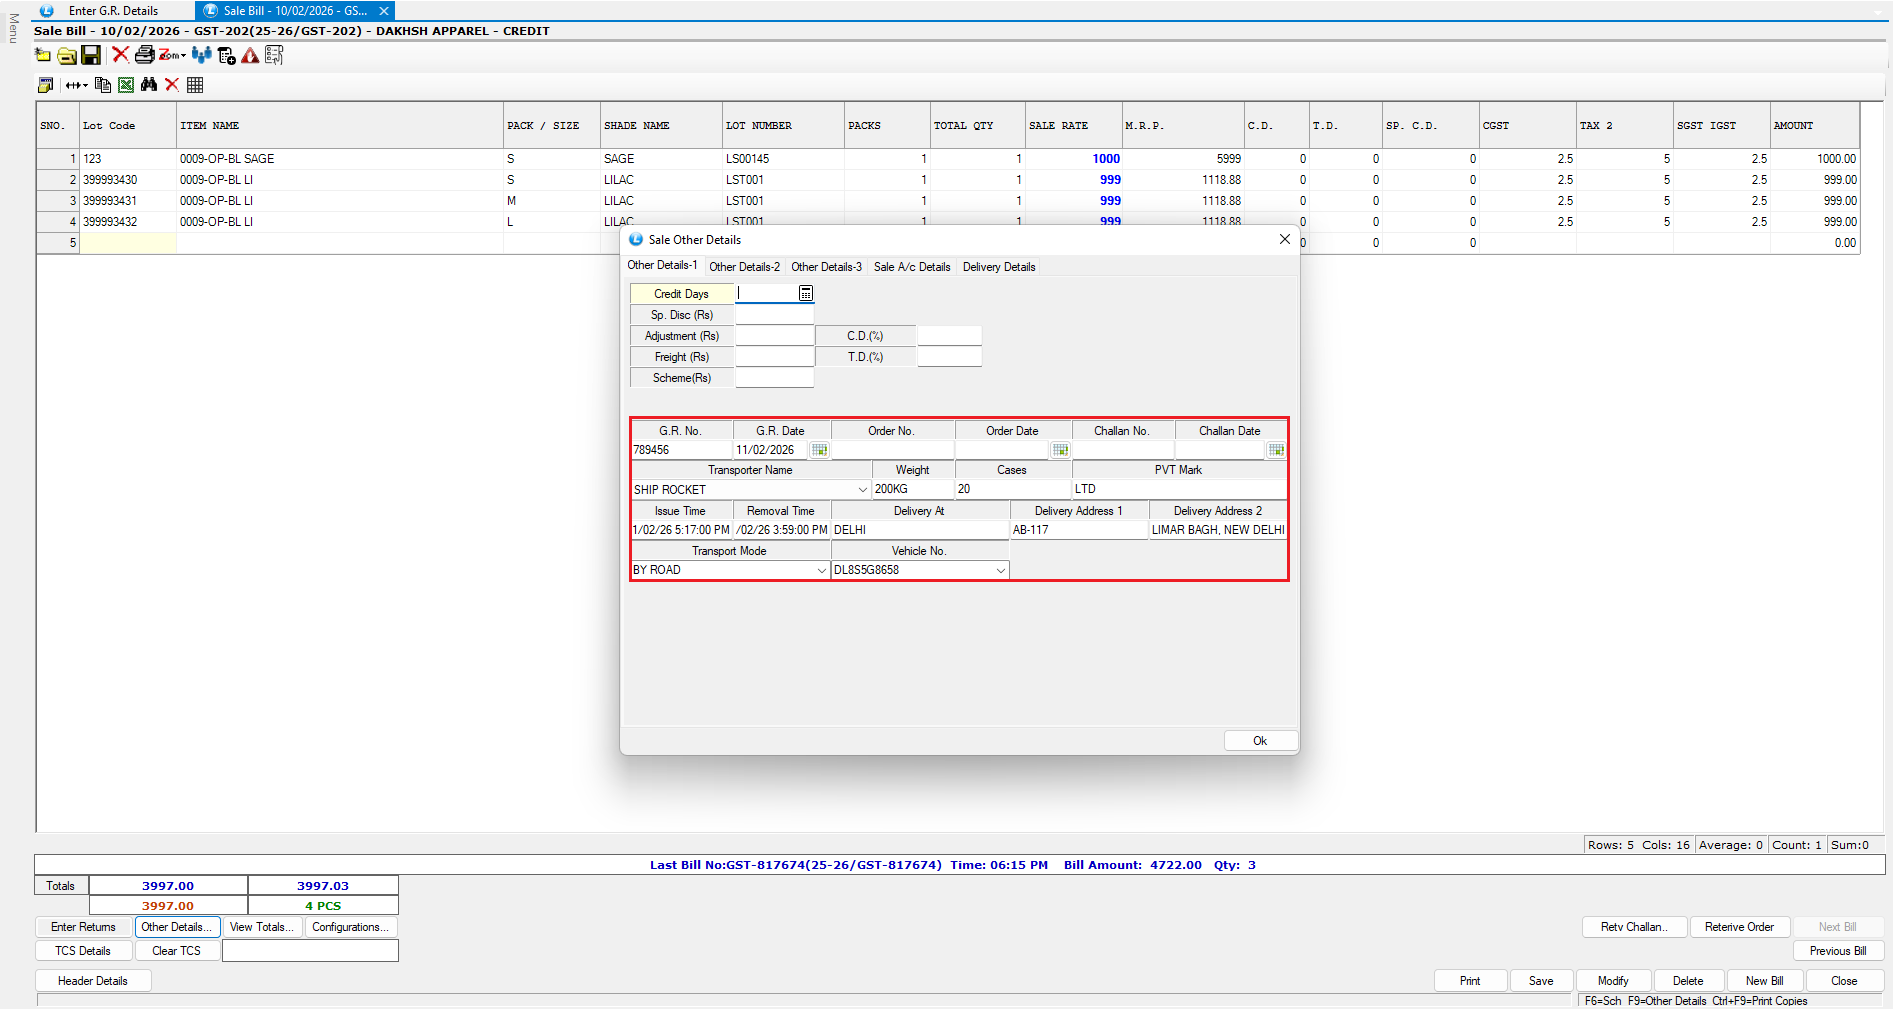
### Enter G.R. Details Bill-Wise
* A data entry window will open for **Bill No. GST-201**
* Enter the required **G.R. details**
* Click **Next** to move to the next bill
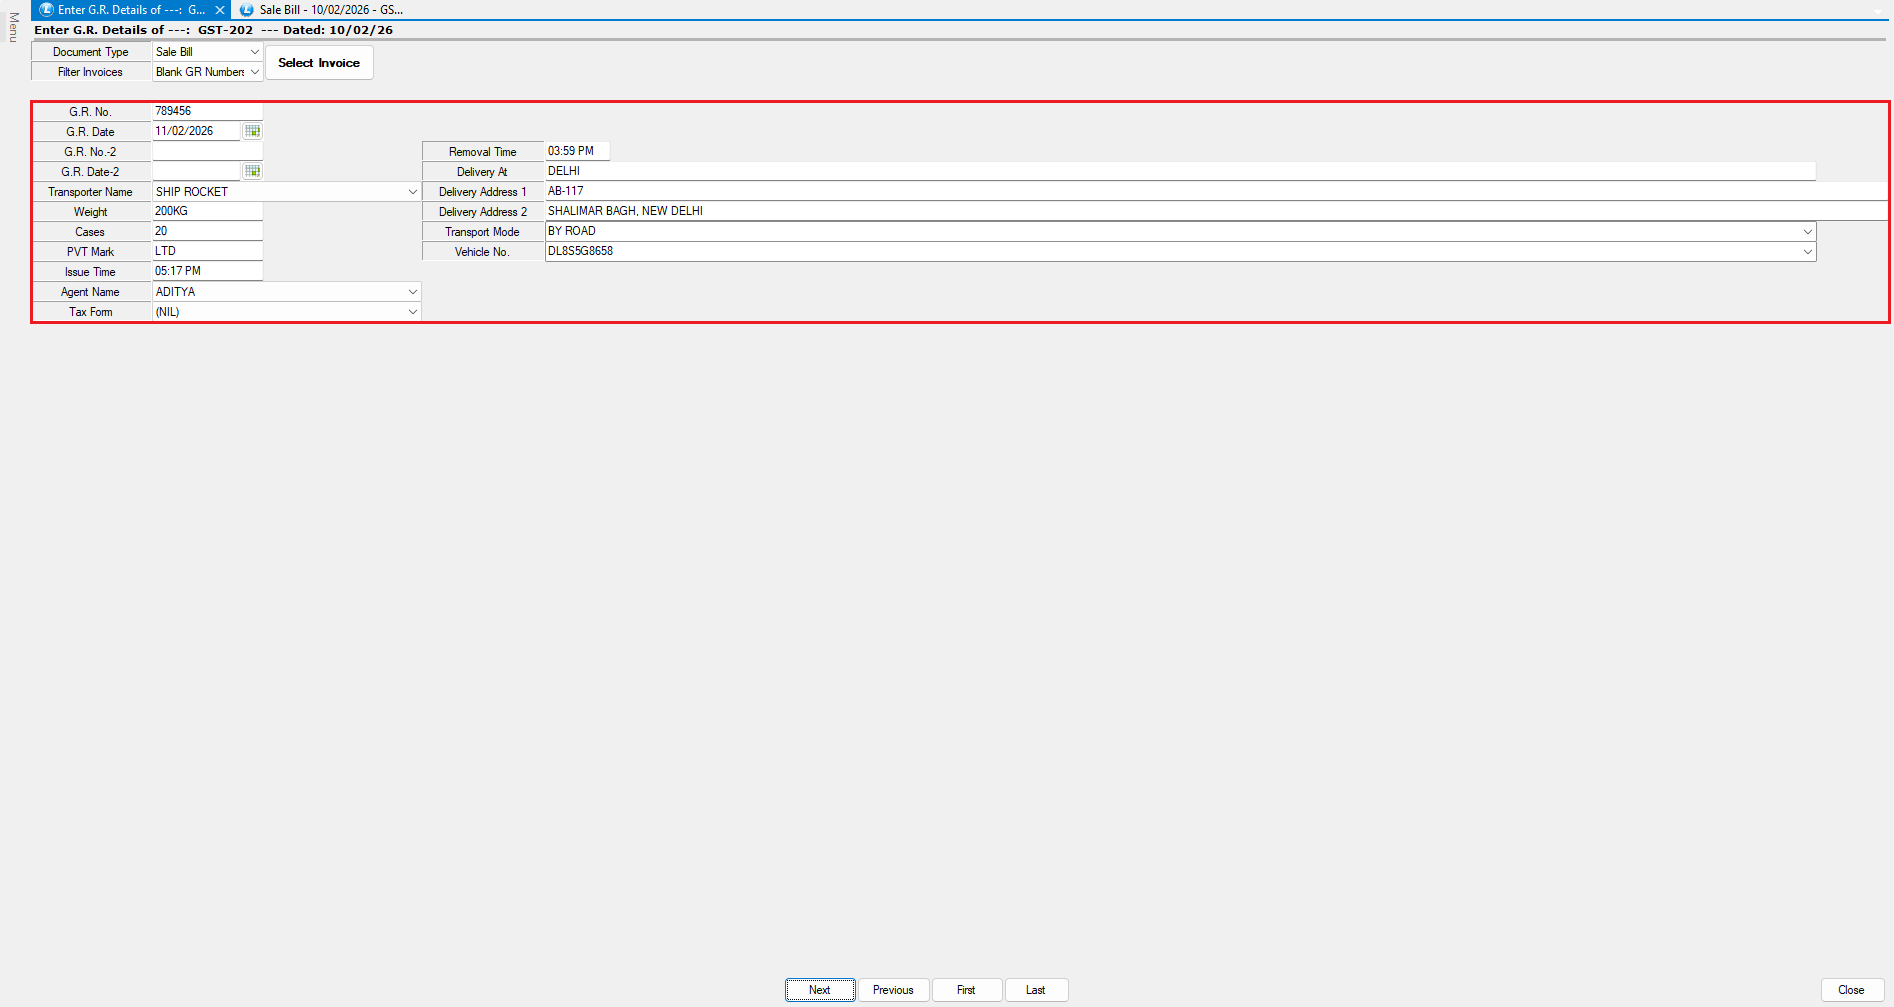
The system will now open **Bill No. GST-202**
* Enter the required G.R. details for this bill
* Click **Next** to save and proceed
***
### Save and Confirm G.R. Entry
* After completing data entry for all selected bills:
* Click **Next** to save the records
* The system successfully records G.R. details for both bills
***
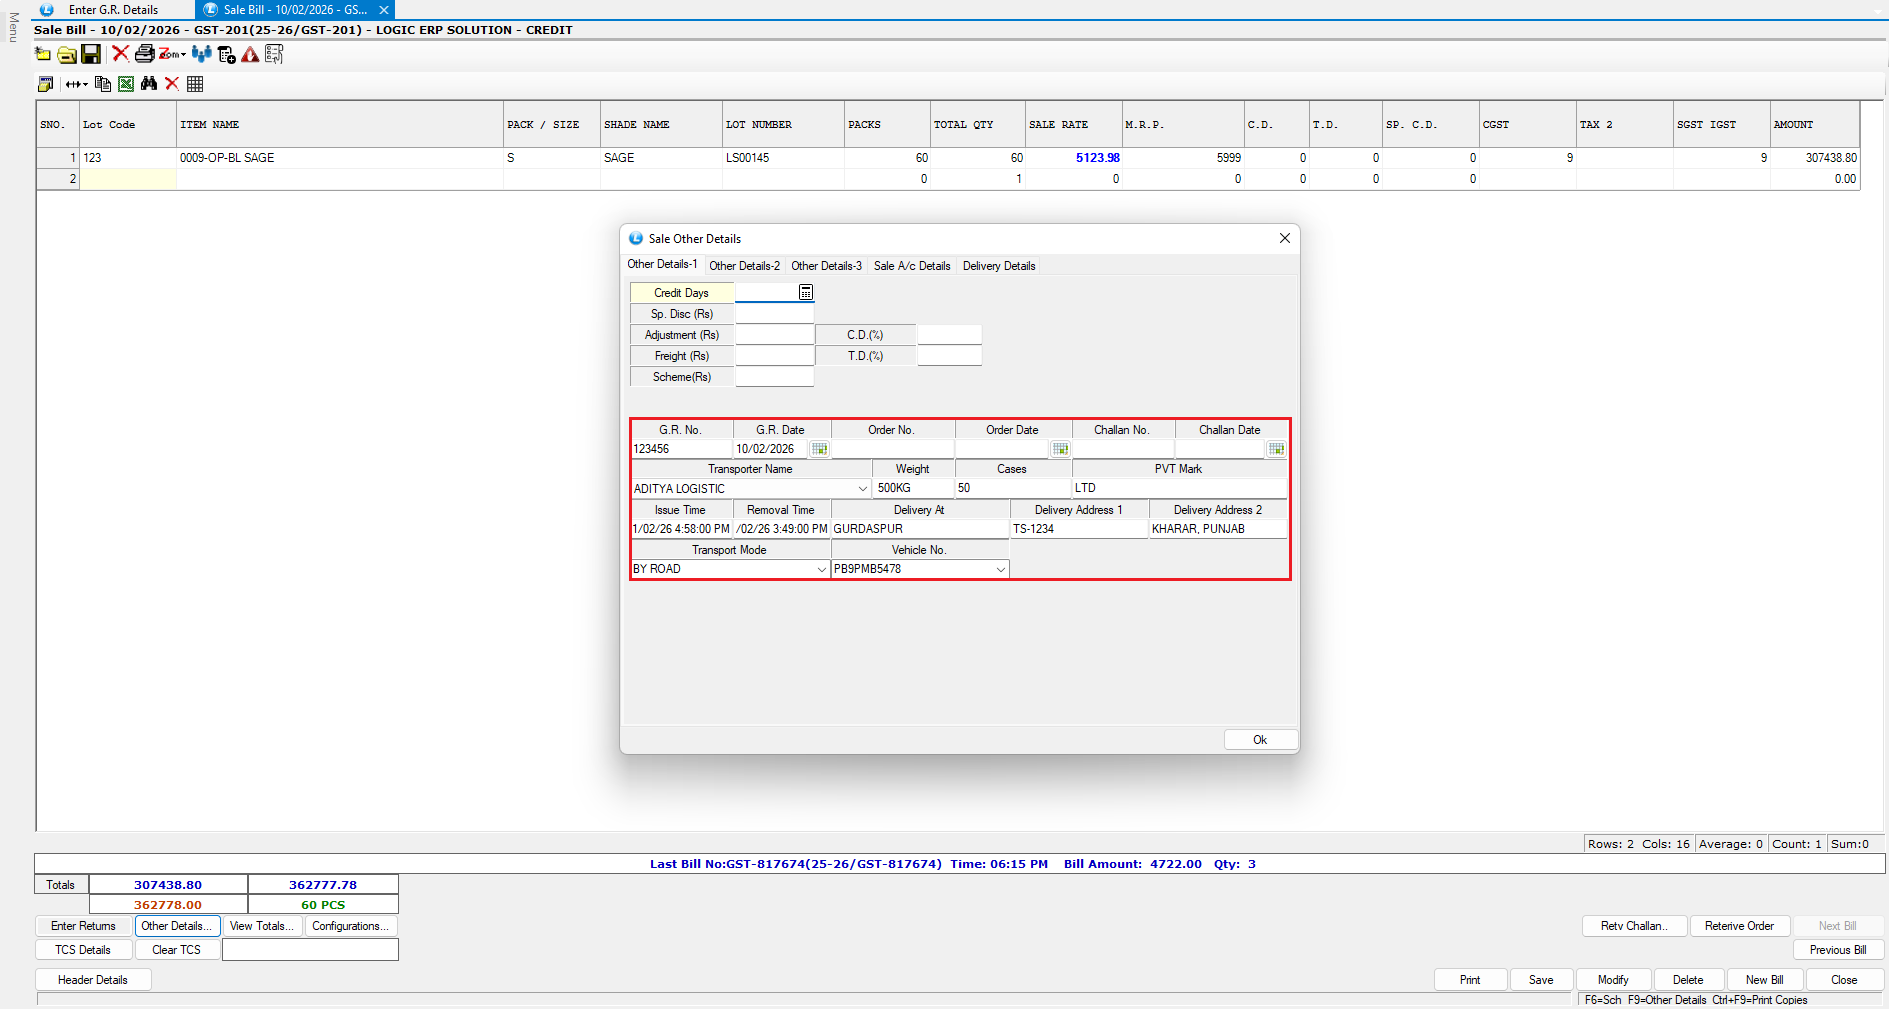
### Verify Updated G.R. Details
**Verify Bill No. GST-201**
* Open **Sale Bill No: GST-201**
* Confirm that G.R. details are now reflected correctly
**Verify Bill No. GST-202**
* Open **Sale Bill No: GST-202**
* G.R. details are also successfully updated here
***
### Conclusion
Using the **Enter G.R. Details** module in Logic ERP allows you to:
* Quickly identify invoices with missing G.R. information
* Enter G.R. details in bulk for multiple bills
* Ensure accurate documentation and tracking
This process improves data accuracy and makes logistics and audit tracking more efficient.
---
# Agent Instructions
This documentation is published with GitBook. GitBook is the documentation platform designed so that both humans and AI agents can read, navigate, and reason over technical content effectively. Learn more at gitbook.com.
## Querying This Documentation
If you need additional information that is not directly available in this page, you can query the documentation dynamically by asking a question.
Perform an HTTP GET request on the current page URL with the `ask` query parameter, and the optional `goal` query parameter:
```
GET https://kb.logicerp.com/logic-erp-learning-hub-tutorials-and-best-practices/billing/enter-g.r.-details.md?ask=&goal=
```
`ask` is the immediate question: it should be specific, self-contained, and written in natural language.
`goal` is optional and describes the broader end goal you are ultimately trying to accomplish on behalf of the user. GitBook uses it to tailor the answer towards what is most useful for that goal.
The response will contain a direct answer to the question and relevant excerpts and sources from the documentation.
Use this mechanism when the answer is not explicitly present in the current page, you need clarification or additional context, or you want to retrieve related documentation sections.